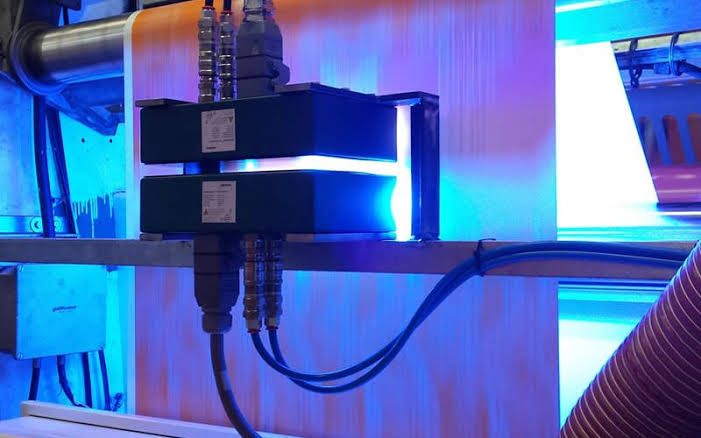
Industrial UV curing has become an essential process across modern manufacturing. From automotive coatings and electronics assembly to printing, adhesives, optical components, medical devices, and industrial finishing, UV curing systems provide fast processing speeds, consistent results, and efficient use of production space.
However, when a UV curing production line starts producing inconsistent results, the problem is not always obvious. A coating may remain tacky. An adhesive may fail to reach the required bond strength. Parts may become overheated. The conveyor may stop unexpectedly. UV intensity may gradually decline even though the lamps still appear to be operating normally.
These problems can reduce production efficiency, increase scrap rates, create quality-control issues, and potentially damage expensive components.
The good news is that most industrial UV curing failures can be traced to a manageable number of factors. Understanding how to identify these problems systematically can help operators and maintenance teams restore production faster and prevent the same issue from happening again.
This guide explains the most common industrial UV curing production line failures, how to diagnose them, and what practical steps can be taken to resolve them.
1. Understanding How an Industrial UV Curing Line Works
Before troubleshooting a UV curing system, it is important to understand the basic process.
A typical industrial UV curing production line may include:
-
UV lamps or LED UV curing modules
-
Power supplies
-
Reflectors or optical systems
-
Cooling systems
-
Conveyor systems
-
Sensors
-
Control panels
-
Exhaust and ventilation equipment
-
Product positioning systems
-
UV intensity monitoring equipment
-
Safety interlocks
-
PLC or automated control systems
During production, the workpiece moves through a controlled curing area. UV radiation activates photoinitiators in the coating, adhesive, ink, or resin. This starts a photochemical reaction that converts the liquid material into a solid or semi-solid cured layer.
The quality of the final result depends on several variables working together.
These include:
UV intensity × exposure time × wavelength × material chemistry × distance × temperature
A failure in any one of these variables can affect curing performance.
For this reason, troubleshooting should not begin by simply replacing the lamp. The correct approach is to identify which process variable has changed.
2. The Most Common Industrial UV Curing Problems
Some failures occur more frequently than others.
Common problems include:
-
Incomplete or insufficient curing
-
Sticky or tacky surfaces
-
Uneven curing
-
Excessive heat
-
UV lamp failure
-
Declining UV intensity
-
Conveyor speed problems
-
Cooling system failure
-
Sensor or interlock faults
-
Power supply problems
-
Product positioning errors
-
Excessive lamp contamination
-
Short lamp life
-
Overcuring or material discoloration
-
Inconsistent curing between production batches
The key is to avoid treating every symptom as a lamp problem.
A curing defect may actually be caused by conveyor speed, optical contamination, insufficient cooling, incorrect material thickness, or an unstable power supply.
3. Problem: UV Coating or Adhesive Is Not Fully Cured
Incomplete curing is one of the most serious UV curing production line problems.
Typical symptoms include:
-
Sticky surfaces
-
Soft coatings
-
Poor scratch resistance
-
Low adhesive strength
-
Surface fingerprints
-
Residual odor
-
Poor chemical resistance
-
Coating transfer when touched
-
Parts failing quality inspection
Several factors can cause incomplete curing.
Insufficient UV Intensity
The UV source may no longer be delivering enough energy to the product.
For traditional mercury UV lamps, aging is a common cause. A lamp can continue producing visible light while its effective UV output has dropped significantly.
For UV LED systems, gradual degradation of LED modules, optical components, or cooling performance can also reduce curing output.
The best solution is to measure actual UV irradiance rather than judging lamp condition visually.
A UV radiometer can help determine whether the curing system is delivering the required energy.
Conveyor Speed Is Too High
UV curing depends not only on intensity but also on exposure time.
If the conveyor moves faster than the validated production speed, the material receives less UV energy.
For example, if a production line was originally validated at a conveyor speed of 10 meters per minute but the actual line is operating at 14 meters per minute, curing performance may change substantially.
Check:
-
Actual conveyor speed
-
Speed controller settings
-
Encoder accuracy
-
PLC parameters
-
Mechanical slipping
-
Belt condition
Do not assume that the displayed conveyor speed is always the actual product speed.
4. Problem: Surface Remains Sticky After Curing
A sticky surface is particularly common with UV coatings, inks, adhesives, and resins.
There are several possible explanations.
Oxygen Inhibition
Some UV-curable materials are sensitive to oxygen inhibition.
Oxygen at the surface can interfere with polymerization, leaving the outermost layer slightly tacky even though the material underneath is cured.
Possible solutions may include:
-
Increasing UV dose
-
Adjusting UV intensity
-
Using a nitrogen inerting system
-
Changing material formulation
-
Optimizing exposure conditions
However, simply increasing UV intensity is not always the correct answer.
If the material chemistry is the primary cause, equipment adjustments alone may not completely solve the problem.
Insufficient Surface Dose
The material may be receiving enough UV energy to cure internally but not enough energy at the surface.
Check the actual UV irradiance at product level.
The measurement location matters because UV intensity can vary significantly across the curing chamber.
5. Problem: Uneven UV Curing Across the Product
Another common industrial UV curing issue is inconsistent curing across the width or surface of a product.
For example:
-
The center cures properly but the edges remain soft.
-
One side cures faster than the other.
-
Parts closer to the lamp cure better.
-
The leading edge and trailing edge have different results.
This usually indicates uneven UV distribution.
Check Lamp Alignment
The distance between the UV source and product surface should be consistent.
If the lamp assembly has shifted, even slightly, the irradiance pattern may change.
Inspect:
-
Lamp mounting brackets
-
Reflectors
-
Product height
-
Conveyor level
-
Mechanical alignment
Inspect Reflectors
Reflectors help direct UV radiation toward the workpiece.
Dust, coating residue, oxidation, discoloration, or physical damage can reduce optical efficiency.
A reflector that looks only slightly dirty can still affect curing performance.
Clean and inspect optical components according to the equipment manufacturer's maintenance requirements.
Measure Across the Working Width
Do not measure UV intensity at only one point.
Use multiple measurement locations across the curing area.
A useful diagnostic procedure is to create an irradiance map showing:
-
Left side
-
Center-left
-
Center
-
Center-right
-
Right side
This can reveal whether the problem is localized or system-wide.
6. Problem: UV Lamp Does Not Turn On
When a UV lamp fails to ignite, operators should first determine whether the issue is electrical, thermal, control-related, or lamp-related.
Possible causes include:
-
Failed lamp
-
Power supply problem
-
Ignition failure
-
Loose connection
-
Blown fuse
-
Safety interlock activation
-
Overtemperature protection
-
Cooling failure
-
Control system fault
Start With the Control Panel
Check whether the system reports an alarm.
Common alarm categories include:
-
Lamp fault
-
Power fault
-
Cooling alarm
-
Door-open alarm
-
Overtemperature alarm
-
Emergency-stop condition
-
Communication fault
Never bypass a safety interlock simply to force the lamp to operate.
Interlocks are designed to prevent dangerous operating conditions.
7. Problem: UV Lamp Turns Off During Production
A lamp that starts normally but shuts down during operation often indicates a protection mechanism or thermal problem.
Overheating
UV lamps generate substantial heat.
If the cooling system cannot remove that heat efficiently, the equipment may automatically shut down to protect the lamp, power supply, or surrounding components.
Check:
-
Cooling fans
-
Air filters
-
Airflow
-
Cooling ducts
-
Temperature sensors
-
Water circulation, if applicable
-
Cooling-water temperature
-
Heat exchangers
For water-cooled UV LED systems, inspect the entire cooling loop.
A pump that is running does not necessarily mean that the system is providing adequate cooling.
8. Problem: UV LED System Overheats
UV LED curing systems are generally more energy-efficient than conventional UV lamps, but thermal management remains critical.
LED output and service life are strongly influenced by temperature.
If the LED module becomes too hot, several problems can occur:
-
Reduced UV output
-
Shortened LED life
-
Automatic shutdown
-
Uneven curing
-
Electronic component damage
For water-cooled systems, inspect:
-
Flow rate
-
Coolant temperature
-
Pump operation
-
Heat exchanger condition
-
Tubing
-
Leaks
-
Flow sensors
For air-cooled systems, inspect:
-
Fans
-
Air filters
-
Air ducts
-
Heat sinks
-
Ventilation paths
Never ignore a repeated thermal alarm.
A temporary reset may restore operation, but it does not solve the underlying problem.
9. Problem: UV Intensity Gradually Decreases
A gradual reduction in curing performance can be difficult to detect because production quality may decline slowly.
The most common causes include:
-
Lamp aging
-
Dirty optical surfaces
-
Reflector degradation
-
LED aging
-
Cooling problems
-
Power instability
-
Sensor drift
-
Material changes
A preventive maintenance program should therefore include regular UV output measurements.
Instead of waiting until products fail inspection, establish an acceptable UV intensity range.
For example:
Baseline intensity → warning threshold → maintenance threshold
The exact values depend on the equipment and material process.
This approach allows maintenance teams to identify degradation before it causes large-scale production problems.
10. Problem: Conveyor Speed Is Unstable
The conveyor is one of the most important components in a continuous UV curing production line.
Even if the UV source is operating perfectly, unstable conveyor speed can create inconsistent curing.
Typical symptoms include:
-
Some parts are fully cured while others are undercured.
-
Product quality changes during the same shift.
-
Curing improves when the conveyor slows down.
-
Defects occur intermittently.
Possible causes include:
-
Worn belts
-
Motor problems
-
Variable-frequency drive faults
-
Encoder errors
-
Mechanical resistance
-
Incorrect PLC settings
-
Slippage
-
Overloaded conveyor sections
Measure actual speed rather than relying exclusively on the control-panel display.
A small speed deviation may have a significant effect when the curing process operates close to its minimum required UV dose.
11. Problem: Cooling Fans Are Loud or Weak
Abnormal fan noise can be an early warning sign.
Possible causes include:
-
Bearing wear
-
Dust buildup
-
Damaged fan blades
-
Motor degradation
-
Blocked ventilation
-
Incorrect fan speed
A fan that sounds normal but moves insufficient air can also create problems.
Maintenance teams should inspect actual airflow when possible.
Filters should be cleaned or replaced according to operating conditions. Dusty manufacturing environments generally require more frequent inspection than clean production areas.
12. Problem: UV Curing Chamber Gets Too Hot
The curing chamber may become excessively hot when heat removal is insufficient.
Possible causes include:
-
Poor ventilation
-
Blocked exhaust
-
Failed cooling fan
-
Dirty air filters
-
Incorrect airflow direction
-
High ambient temperature
-
Excessive lamp power
-
Product heat accumulation
High chamber temperatures can affect not only UV equipment but also:
-
Substrates
-
Adhesives
-
Coatings
-
Electronics
-
Conveyor components
-
Sensors
Temperature-sensitive materials may require active cooling or a carefully controlled curing profile.
13. Problem: Product Is Overcured or Discolored
More UV energy does not always mean better results.
Excessive UV exposure can cause:
-
Yellowing
-
Surface cracking
-
Brittleness
-
Gloss changes
-
Substrate deformation
-
Adhesive degradation
-
Coating discoloration
Excessive heat can make the problem worse.
If discoloration suddenly appears after a maintenance adjustment, check whether someone changed:
-
Lamp power
-
Exposure time
-
Conveyor speed
-
Lamp-to-product distance
-
Cooling parameters
Production settings should be controlled through validated process parameters rather than informal operator adjustments.
14. Problem: UV Curing Works on Some Materials but Not Others
Different UV-curable materials can have very different curing requirements.
Two coatings may look similar but require different:
-
UV wavelengths
-
Energy doses
-
Irradiance levels
-
Exposure times
-
Peak intensities
-
Temperature conditions
A UV source suitable for one formulation may not provide optimal results for another.
This is particularly important when changing suppliers or introducing a new coating, ink, adhesive, or resin.
Before changing production parameters, review the material supplier's technical data and curing recommendations.
15. Problem: New Material Suddenly Causes Production Failures
If equipment performance has remained stable but curing quality changes immediately after a material change, investigate the material before replacing equipment.
Possible changes include:
-
Resin formulation
-
Photoinitiator concentration
-
Pigment loading
-
Coating thickness
-
Viscosity
-
Color
-
Application method
-
Shelf life
-
Storage conditions
Dark or highly pigmented materials can be particularly challenging because UV penetration may be limited.
A black coating, for example, may require different curing conditions from a clear coating.
16. Problem: UV Lamp Life Is Shorter Than Expected
Frequent lamp replacement increases operating costs and production downtime.
Lamp life can be reduced by:
-
Excessive operating temperature
-
Improper cooling
-
Frequent starts and stops
-
Incorrect electrical conditions
-
Contamination
-
Mechanical shock
-
Improper installation
For mercury lamps, avoid touching the lamp surface with bare hands during installation. Oils and contaminants can affect lamp performance and thermal behavior.
Follow the manufacturer's installation and handling procedures.
For UV LED systems, monitor thermal performance and electrical conditions rather than treating LEDs exactly like conventional lamps.
17. Problem: Optical Components Become Dirty Quickly
In many production environments, contamination is unavoidable.
Coating overspray, ink mist, dust, oil vapor, and airborne particles can accumulate on:
-
Lamp windows
-
Quartz plates
-
Reflectors
-
Protective covers
-
Cooling passages
This contamination reduces UV transmission and can also increase heat accumulation.
A regular cleaning schedule should consider:
-
Production volume
-
Material type
-
Environmental dust
-
Overspray
-
Operating hours
Do not wait until curing defects appear before inspecting optical components.
18. Problem: Safety Interlock Prevents UV System From Starting
Industrial UV equipment must incorporate safety mechanisms because intense UV radiation can damage skin and eyes.
A system may refuse to start if:
-
A chamber door is open
-
A protective cover is removed
-
Emergency stop is activated
-
Cooling is insufficient
-
Temperature is too high
-
Airflow is inadequate
-
A sensor has failed
Operators should treat these alarms as real safety conditions.
Never permanently bypass an interlock because it is inconvenient.
If an interlock repeatedly triggers without an obvious cause, inspect the sensor, wiring, alignment, and control logic with qualified personnel.
19. A Step-by-Step UV Curing Troubleshooting Process
When a curing problem appears, a structured diagnostic process is more effective than random component replacement.
Step 1: Identify the Exact Symptom
Define the failure precisely.
Instead of saying:
“Curing is bad.”
Document:
“Surface tack increased on the right side of the product after 2:00 p.m.”
Specific information makes troubleshooting much faster.
Step 2: Check Whether the Problem Is Global or Local
Ask:
-
Does every product have the defect?
-
Is only one product affected?
-
Is only one side affected?
-
Did the problem begin suddenly?
-
Did it develop gradually?
These answers can immediately narrow the possible causes.
Step 3: Review Recent Changes
Check whether anything changed before the failure.
Examples include:
-
New material
-
New operator
-
Lamp replacement
-
Conveyor adjustment
-
Maintenance activity
-
Production-speed change
-
Cooling-system work
-
Software modification
Many production failures occur shortly after a process change.
Step 4: Measure UV Output
Use an appropriate radiometer or monitoring device.
Do not rely on visual brightness.
Visible light does not provide an accurate indication of UV curing performance.
Step 5: Check Conveyor Speed
Verify actual product travel speed.
Compare the measurement against the validated process setting.
Step 6: Inspect Cooling
Check fans, airflow, water flow, temperature, and alarms.
Step 7: Inspect Optical Components
Look for:
-
Dust
-
Coating residue
-
Cracks
-
Discoloration
-
Misalignment
Step 8: Verify Material Conditions
Check:
-
Batch
-
Expiration date
-
Storage
-
Viscosity
-
Thickness
-
Application uniformity
Step 9: Compare With a Known-Good Condition
If possible, compare current measurements with historical baseline data.
This is often much more useful than simply asking whether the equipment “looks normal.”
20. Preventive Maintenance for Industrial UV Curing Systems
The most effective way to reduce unexpected failures is to maintain the curing system before problems become production defects.
A maintenance program can include several levels.
Daily Checks
Operators can inspect:
-
Alarm status
-
Lamp operation
-
Cooling airflow
-
Conveyor movement
-
Unusual noise
-
Product curing quality
-
Chamber temperature
Weekly Checks
Maintenance personnel can inspect:
-
Optical surfaces
-
Cooling filters
-
Fans
-
Electrical connections
-
Conveyor components
-
Sensors
Monthly Checks
Depending on equipment usage:
-
Measure UV output
-
Inspect lamp condition
-
Verify conveyor speed
-
Check temperature sensors
-
Inspect electrical components
-
Review alarm history
Periodic Professional Inspection
More detailed inspections may include:
-
Power supply performance
-
UV intensity mapping
-
Electrical safety
-
Thermal performance
-
Control system diagnostics
-
Lamp or LED module performance
-
Calibration verification
The exact maintenance interval should follow the equipment manufacturer's recommendations and the actual production environment.
21. Why UV Intensity Monitoring Matters
One of the biggest improvements a production facility can make is moving from visual inspection to measurable process control.
Without UV intensity monitoring, operators may only discover a problem when products fail.
With regular measurements, maintenance teams can identify trends.
For example:
Week 1: Stable output
Week 4: Slight reduction
Week 8: Noticeable reduction
Week 10: Maintenance threshold reached
This creates an opportunity for planned maintenance instead of emergency downtime.
Data logging can make this approach even more effective.
22. How to Reduce Unplanned UV Curing Downtime
A reliable production line depends on more than equipment quality.
Operational discipline also matters.
Standardize Production Parameters
Document:
-
Lamp power
-
UV dose
-
Irradiance
-
Conveyor speed
-
Product distance
-
Cooling settings
-
Material thickness
This prevents operators from making undocumented adjustments.
Keep Spare Parts Available
Depending on the equipment, critical spare parts may include:
-
Lamps
-
Fuses
-
Filters
-
Fans
-
Sensors
-
Power-supply components
-
Cooling-system components
The goal is not to stock every component.
Instead, identify parts that can stop production if they fail.
Maintain a Troubleshooting Log
Record:
-
Failure date
-
Product
-
Material batch
-
Machine settings
-
Alarm code
-
UV intensity
-
Temperature
-
Conveyor speed
-
Corrective action
-
Final result
Over time, this creates a valuable history of equipment behavior.
23. Common Troubleshooting Mistakes to Avoid
Even experienced operators can make diagnostic mistakes.
Mistake 1: Immediately Replacing the Lamp
A curing problem does not automatically mean the lamp is defective.
Measure first.
Mistake 2: Increasing Lamp Power Without Testing
Higher power may solve undercuring but can create overheating, discoloration, or material damage.
Mistake 3: Ignoring Conveyor Speed
Exposure time is a critical part of the curing process.
Mistake 4: Cleaning Optical Components Incorrectly
Incorrect cleaning materials or techniques can damage sensitive surfaces.
Follow equipment-specific procedures.
Mistake 5: Bypassing Safety Systems
Never disable safety interlocks as a shortcut.
Mistake 6: Changing Multiple Parameters at Once
If lamp power, conveyor speed, and material thickness are changed simultaneously, it becomes difficult to determine which change solved the problem.
Change one controlled variable at a time whenever practical.
24. UV Lamp vs. UV LED Troubleshooting
Although conventional UV lamps and UV LED curing systems perform similar functions, their failure modes can differ.
Conventional UV Lamp Systems
Common issues include:
-
Lamp aging
-
Ignition failure
-
Reflector contamination
-
Cooling problems
-
Power-supply faults
-
Frequent lamp replacement
UV LED Systems
Common issues include:
-
Thermal management problems
-
LED module degradation
-
Cooling-system failure
-
Optical-window contamination
-
Power-control faults
-
Individual module output variation
This distinction matters when creating maintenance procedures.
Technicians should use diagnostic methods appropriate for the specific UV technology.
25. When Should You Call a Professional Technician?
Some issues can be handled by trained operators, while others require qualified technical personnel.
Operators can generally perform basic inspections such as:
-
Checking alarms
-
Inspecting visible contamination
-
Confirming conveyor operation
-
Checking filters
-
Reporting unusual temperatures or noises
Technical personnel may be required for:
-
Electrical troubleshooting
-
Power-supply repair
-
UV output calibration
-
Lamp replacement procedures
-
LED module replacement
-
PLC problems
-
Sensor calibration
-
Cooling-system repair
UV curing equipment can contain high-voltage electrical components and intense UV radiation.
Always follow appropriate lockout/tagout, electrical safety, UV protection, and equipment-specific procedures.
26. Building a Reliable UV Curing Process
The best troubleshooting strategy is prevention.
A stable UV curing process should have clearly defined operating windows.
For example:
Material: validated coating or adhesive
Thickness: controlled range
UV wavelength: matched to formulation
Irradiance: validated range
UV dose: validated minimum
Conveyor speed: controlled range
Temperature: controlled range
Cooling: verified
Product position: standardized
When these parameters are documented, troubleshooting becomes much easier.
Instead of asking:
“Why is this product not curing?”
the maintenance team can ask:
“Which validated parameter has moved outside its acceptable range?”
That is a much more productive question.
27. The Role of Automation in UV Curing Troubleshooting
Modern industrial UV curing production lines increasingly use automated monitoring.
Sensors and control systems can monitor:
-
UV intensity
-
Temperature
-
Conveyor speed
-
Cooling flow
-
Lamp status
-
System alarms
-
Product position
Advanced systems can also store historical operating data.
This enables manufacturers to identify gradual degradation before it becomes a major quality issue.
For high-volume production, automated monitoring can significantly improve process consistency.
28. A Practical UV Curing Troubleshooting Checklist
When a production problem occurs, maintenance personnel can work through this checklist:
UV Source
-
Is the lamp or LED module operating?
-
Is output within the expected range?
-
Is the power supply stable?
-
Is the lamp approaching the end of its service life?
Optical System
-
Are reflectors clean?
-
Is the protective window clean?
-
Is the lamp correctly aligned?
-
Is the lamp-to-product distance correct?
Conveyor
-
Is the conveyor speed correct?
-
Is the belt slipping?
-
Is the motor operating normally?
-
Is the encoder functioning?
Cooling
-
Is airflow sufficient?
-
Is water flow sufficient?
-
Are filters clean?
-
Are temperature alarms active?
Material
-
Is the material correct?
-
Is the material within its shelf life?
-
Has the formulation changed?
-
Is the coating thickness correct?
Control System
-
Are there active alarms?
-
Are safety interlocks functioning?
-
Are sensor readings normal?
-
Have any parameters recently changed?
Product
-
Is product positioning consistent?
-
Is the substrate compatible?
-
Is the surface clean?
-
Is the coating thickness uniform?
This checklist can help reduce diagnostic time and prevent unnecessary part replacement.
29. Final Thoughts: Turn Troubleshooting Into Process Control
Industrial UV curing problems can have many causes, but most can be traced through a structured diagnostic process.
The most important principle is simple:
Measure before you modify.
Do not immediately increase UV power. Do not automatically replace the lamp. Do not assume the coating is defective. Do not ignore conveyor speed or cooling.
Instead, collect data.
Measure UV intensity.
Verify exposure time.
Check temperature.
Inspect optical components.
Confirm material conditions.
Review recent process changes.
Compare current performance with historical baselines.
A well-maintained industrial UV curing production line should not depend entirely on an operator's visual judgment or experience. It should be supported by measurable parameters, preventive maintenance, documented procedures, and reliable monitoring.
When UV output, conveyor speed, temperature, cooling, material properties, and product positioning are properly controlled, manufacturers can achieve more consistent curing quality while reducing scrap, downtime, and unexpected maintenance costs.
Whether the production line uses mercury UV lamps, UV LED systems, or a combination of curing technologies, systematic troubleshooting is the foundation of reliable operation.
The goal is not simply to fix today's UV curing failure.
The goal is to understand why the failure happened, prevent it from returning, and build a production process that remains stable over thousands of operating cycles.