
Gel polish looks flawless when it’s done right.
Smooth surface.
Mirror-like shine.
Chip-resistant wear that lasts for weeks.
But behind every perfect gel manicure is one step that makes—or breaks—everything:
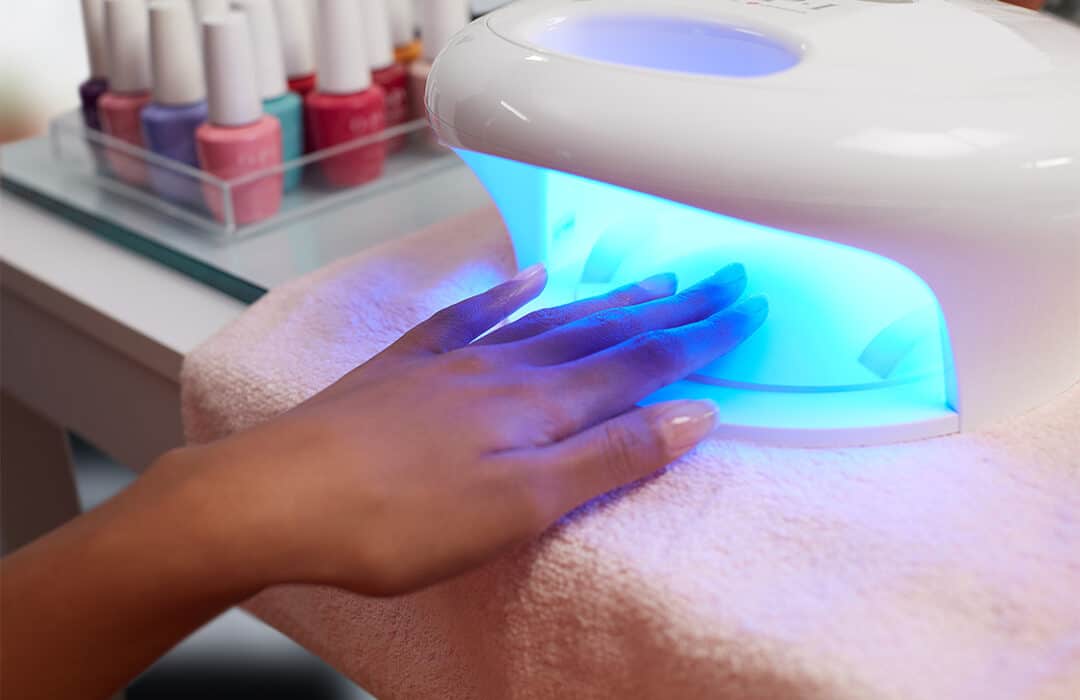
Curing.
If you’ve ever experienced:
-
Gel that wrinkles or shrinks
-
Sticky layers that never seem to dry
-
Color that peels off in days
-
Burning sensations during curing
You’re not bad at gel nails.
You’re just missing a few key rules.
This guide is designed to help beginners avoid the most common gel curing mistakes—by understanding UV lamp power, curing time, and how gel polish actually hardens.
No chemistry degree required.
No professional salon experience needed.
Just clear, practical knowledge you can actually use.
Why Gel Polish Curing Is So Easy to Get Wrong
Regular nail polish dries by evaporation.
Gel polish does not.
Gel polish cures through a chemical reaction triggered by UV or LED light. That reaction must happen:
-
At the right wavelength
-
With enough energy
-
For the correct amount of time
Too little exposure, and the gel stays under-cured.
Too much, and you risk heat spikes, brittleness, or damage.
Curing is not about guessing—it’s about matching the lamp, the gel, and the timing.
What “Curing” Really Means (In Plain English)
Inside gel polish are photoinitiators.
When exposed to UV or LED light:
-
These molecules activate
-
Polymer chains form
-
The liquid gel hardens into a solid coating
If the light is:
-
Too weak → the reaction is incomplete
-
Too short → the gel hardens on top but stays soft underneath
That’s why nails can feel dry but still peel or wrinkle later.
True curing happens from the bottom layer up, not just on the surface.
UV Lamp vs. LED Lamp: Clearing the Confusion
Many beginners think UV and LED lamps are completely different tools.
In reality:
-
LED lamps still emit UV light
-
They just use a narrower, more efficient wavelength range
Traditional UV Lamps
-
Usually lower power
-
Cure a wider range of gels
-
Require longer curing times
LED Lamps
-
Higher intensity
-
Faster curing
-
Designed for modern gel formulas
Most modern “UV/LED lamps” combine both concepts for compatibility.
The key is not the label—it’s output and wavelength.
Understanding Lamp Power: What Wattage Actually Means
One of the biggest beginner mistakes is assuming:
“Higher wattage = always better.”
Not exactly.
What Wattage Tells You
Wattage indicates potential output, not guaranteed effectiveness.
A 48W lamp can still cure poorly if:
-
LEDs are poorly positioned
-
Wavelength doesn’t match the gel
-
Light distribution is uneven
That said, wattage still matters.
General Wattage Guidelines for Beginners
-
24W–36W: Entry-level, slower curing
-
36W–48W: Ideal balance for home use
-
48W–60W: Faster curing, requires proper timing
For most beginners, 36W–48W is the safest and most forgiving range.
Why Stronger Lamps Can Still Cause Problems
More power doesn’t mean zero mistakes.
High-power lamps can cause:
-
Heat spikes (that burning sensation)
-
Rapid surface curing with soft layers underneath
-
Over-curing brittle gel
This happens when time isn’t adjusted properly.
Power and time always work together.
Curing Time: The Most Common Beginner Pitfall
If wattage is the engine, curing time is the steering wheel.
And most beginners steer blindly.
Typical Beginner Mistakes
-
Using the same time for every gel
-
Assuming darker colors cure the same as light ones
-
Ignoring gel thickness
Curing time is not universal.
How Gel Color Affects Curing Time
This is one of the most misunderstood topics in DIY gel nails.
Light Colors
-
Allow UV to penetrate easily
-
Cure faster
-
Lower risk of under-curing
Dark Colors
-
Absorb more light
-
Block UV penetration
-
Require longer curing time
Black, deep red, navy, and dark green gels often need extra time—even under strong lamps.
If dark gels wrinkle or peel, it’s usually a curing issue, not application.
Thickness: More Gel ≠ Better Results
Beginners often apply gel too thickly to get rich color in one coat.
This creates a problem:
-
The surface cures
-
The bottom stays soft
Result:
-
Shrinking
-
Wrinkling
-
Peeling within days
The Rule of Thin Layers
-
Two or three thin coats cure better than one thick coat
-
Thin layers allow light to reach the base
-
Each layer cures evenly and fully
Professional-looking results come from patience—not thickness.
Recommended Curing Time Cheat Sheet
While every gel brand is different, these guidelines work for most beginners.
With a 36W–48W UV/LED Lamp:
-
Base coat: 30–60 seconds
-
Light color gel: 60 seconds per layer
-
Dark color gel: 60–90 seconds per layer
-
Top coat: 60 seconds
If in doubt, add time—not thickness.
The Sticky Layer Myth
Many beginners panic when nails feel sticky after curing.
This is normal.
The sticky residue is an oxygen inhibition layer, not uncured gel.
It:
-
Helps layers bond together
-
Is meant to stay until final top coat
-
Can be wiped off after the last cure if needed
Sticky does not automatically mean under-cured.
Soft, wrinkled, or peeling does.
Heat Spikes: Why Nails Sometimes Burn
That sudden heat sensation during curing is called a polymerization heat spike.
It happens when:
-
High power lamps cure gel too fast
-
Thick layers generate more heat
-
Natural nails are thin or damaged
How to Reduce Heat Spikes
-
Use thinner layers
-
Cure in shorter intervals
-
Remove hand briefly if needed
-
Avoid overpowered lamps as a beginner
Pain is not a sign of better curing.
Matching Lamp and Gel: The Compatibility Problem
Not all gels cure equally under all lamps.
Reasons include:
-
Different photoinitiators
-
Different required wavelengths
-
Different curing speeds
If a gel brand recommends specific curing times or lamp types—follow them.
When mixing brands:
-
Start with longer curing times
-
Test on one nail first
-
Watch for wrinkling or softness
Common Beginner Curing Mistakes (And How to Fix Them)
Mistake 1: “It Feels Dry, So It’s Cured”
Surface dryness means nothing.
Always cure based on time and lamp power, not touch.
Mistake 2: Using One Time for Everything
Base, color, and top coats cure differently.
Adjust accordingly.
Mistake 3: Rushing Dark Colors
Dark gels need patience.
Thin layers + longer curing = better wear.
Mistake 4: Blaming the Gel Immediately
Most issues come from curing technique, not product quality.
How to Tell If Gel Is Properly Cured
Properly cured gel:
-
Feels firm, not rubbery
-
Doesn’t dent under pressure
-
Doesn’t wrinkle during top coat
-
Lasts 2–3 weeks without peeling
If problems appear within days, curing is the first thing to review.
Building a Beginner-Friendly Curing Routine
Consistency beats complexity.
A simple routine:
-
Prep nails properly
-
Apply thin base coat → cure
-
Apply thin color coat → cure
-
Repeat color if needed
-
Apply top coat → cure
Same lamp.
Same position.
Same timing.
Reliable results come from repeatable habits.
Why “More Curing” Isn’t Always the Answer
Over-curing can:
-
Make gel brittle
-
Cause cracking
-
Increase lifting at edges
Once the gel is fully cured, extra exposure doesn’t improve strength.
The goal is complete curing—not maximum exposure.
Final Thoughts: Gel Curing Is a Skill, Not a Mystery
Great gel nails don’t come from:
-
The most expensive lamp
-
The highest wattage
-
Blind trial and error
They come from understanding:
-
How UV light works
-
How gel responds
-
How power and time interact
Once you master curing, everything else becomes easier.
Smooth color.
Long wear.
No lifting.
No guessing.
Just confident, repeatable results—even at home.


