
Your UV lamp suddenly stops working. You flip the switch, plug it into a different outlet, and still nothing happens. Or perhaps it flickers briefly before going dark, emits a faint glow, or only works intermittently.
At this point, many people ask the same question:
Is the UV bulb burned out, or has the ballast failed?
The answer matters because replacing the wrong component wastes both time and money. A UV bulb may cost only a fraction of the price of a replacement ballast, while an unnecessary ballast replacement can become an expensive repair if the actual problem is simply an aging lamp tube.
Fortunately, you don't have to be a professional electrician to narrow down the issue. By understanding how a UV lamp power system works and learning to recognize a few common symptoms, you can quickly determine whether the problem lies in the bulb, the ballast, or another electrical component.
This guide explains how UV lamp power systems function, compares the warning signs of bulb and ballast failure, and walks you through a practical step-by-step diagnostic process.
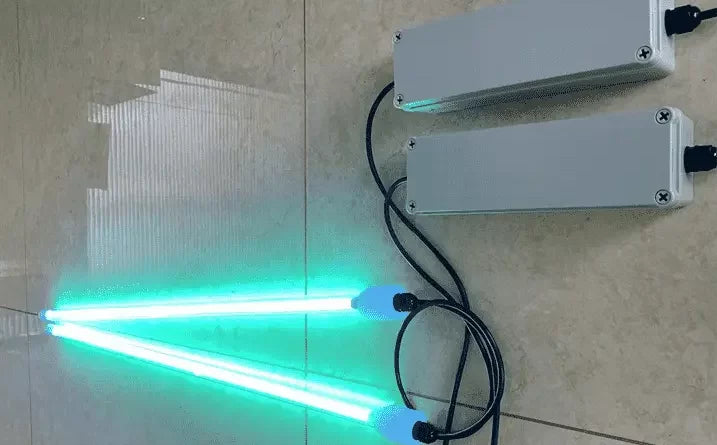
Understanding How a UV Lamp Power System Works
Before troubleshooting, it helps to know the basic components involved.
Most traditional UV lamps—especially UV mosquito traps, UV sterilization units, and fluorescent-style UV curing systems—contain four major electrical elements:
- Power supply.
- Power switch and wiring.
- Electronic or magnetic ballast.
- UV lamp tube (bulb).
The process is fairly straightforward. Electricity enters the device through the power cord, passes through the switch, flows into the ballast, and then reaches the UV bulb. The ballast regulates electrical current and provides the high startup voltage needed to ignite the lamp.
Without a functioning ballast, the bulb cannot operate correctly. Likewise, a defective bulb will not light even if the ballast is working perfectly.
Modern UV LED lamps often eliminate the traditional ballast and replace it with an LED driver circuit, but millions of fluorescent UV systems in homes and businesses still rely on ballasts.
Understanding this relationship is the key to accurate troubleshooting.
What Does a UV Ballast Actually Do?
Many people think the ballast is simply a power adapter, but it performs a much more important role.
Fluorescent UV bulbs require a brief surge of high voltage to start. Once the lamp ignites, they need carefully regulated current to prevent overheating and electrical runaway.
The ballast performs three primary functions:
- Provides startup voltage.
- Controls operating current.
- Stabilizes lamp performance during operation.
Without a ballast, the bulb either would not start or would quickly destroy itself due to uncontrolled electrical flow.
Electronic ballasts have largely replaced older magnetic designs because they:
- Operate more efficiently.
- Produce less heat.
- Eliminate most audible humming.
- Improve lamp lifespan.
- Reduce flickering.
However, like any electronic component, ballasts eventually wear out.
Common Symptoms of a Bad UV Bulb
In many cases, the UV tube itself is the source of the problem.
Unlike incandescent bulbs that fail suddenly, fluorescent UV bulbs often degrade gradually. Their ultraviolet output weakens long before the lamp completely stops producing visible light.
1. Blackened or Dark Ends
One of the easiest signs to identify is discoloration near the ends of the tube. Dark gray or black rings often indicate electrode wear inside the lamp.
A bulb with heavily blackened ends is usually approaching the end of its service life.
2. The Lamp Flickers Before Turning On
If the UV lamp flickers repeatedly before stabilizing—or never fully stabilizes at all—the electrodes inside the tube may be deteriorating.
This symptom becomes increasingly common as the bulb ages.
3. Dim UV Output
A UV mosquito trap may suddenly catch fewer insects, or a UV curing lamp may require much longer exposure times. Even if the bulb appears to light normally, its ultraviolet intensity may have declined significantly.
This is especially common after several thousand hours of use.
4. The Bulb Works in Another Fixture
If you install the same bulb into a compatible fixture and it fails there as well, you've confirmed the bulb itself is defective.
This simple swap test is one of the fastest ways to isolate the problem.
5. Intermittent Operation with No Other Electrical Symptoms
If the lamp occasionally lights but gradually fades or struggles to restart after cooling down, the bulb may simply be worn out.
Common Symptoms of a Failing Ballast
Ballast problems can mimic bulb failures, but several warning signs point more directly toward the power regulation system.
1. The Bulb Never Lights, Even After Replacement
One of the strongest indicators of ballast failure is installing a brand-new UV tube only to find that nothing changes.
If a known-good bulb still refuses to operate, the ballast becomes the primary suspect.
2. Continuous Flickering
A weak ballast may fail to deliver stable operating current, causing constant flickering or repeated startup attempts.
Unlike a worn bulb, the flickering may remain unchanged even after replacing the lamp.
3. Buzzing or Humming Noises
Older magnetic ballasts often produce a low hum, but loud or unusual buzzing sounds can indicate internal electrical failure.
Electronic ballasts are generally very quiet, so any noticeable noise may deserve investigation.
4. Burn Marks or a Burnt Smell
A failed ballast may overheat, producing:
- Burnt plastic odors.
- Discolored housing.
- Melted wire insulation.
- Brown or black marks near internal components.
If you notice these signs, disconnect power immediately and avoid operating the unit until repairs are completed.
5. The Circuit Breaker Trips Repeatedly
An internally shorted ballast may draw excessive current, causing household breakers or internal protection devices to activate.
Repeated breaker trips should never be ignored.
Ballast vs. Bulb: A Side-by-Side Symptom Comparison
| Symptom | More Likely Bulb | More Likely Ballast |
|---|---|---|
| Blackened tube ends | ✔ | |
| UV output gradually weakens | ✔ | |
| New bulb solves the problem | ✔ | |
| Lamp never starts with new bulb | ✔ | |
| Loud buzzing from fixture | ✔ | |
| Burnt smell inside housing | ✔ | |
| Constant flickering after bulb replacement | ✔ | |
| Bulb fails in multiple fixtures | ✔ | |
| Multiple bulbs fail in the same fixture | ✔ | |
| Breaker trips when lamp starts | ✔ |
While no single symptom guarantees a diagnosis, patterns like these help narrow down the likely culprit.
Step 1: Verify the Power Supply First
Before blaming either the ballast or the bulb, confirm that the fixture is actually receiving power.
Check:
- The wall outlet.
- The extension cord or power strip.
- The power adapter.
- The device fuse.
- The on/off switch.
Test the outlet using another electrical appliance. Inspect the power cord for cuts, kinks, or loose connectors.
Many apparent "ballast failures" are ultimately traced back to a faulty power connection.
Step 2: Perform a Visual Inspection of the UV Tube
Once power is confirmed, remove the UV bulb and inspect it carefully.
Look for:
- Blackened ends.
- Cracks in the glass.
- Cloudiness inside the tube.
- Broken or bent pins.
- Loose end caps.
If any of these conditions are present, replacing the bulb is the logical first step.
Compared to a ballast, the bulb is generally less expensive and easier to replace.
Step 3: Replace the Bulb with a Known Working Unit
Professional technicians often follow a simple rule:
Replace the easiest and least expensive component first.
Install a compatible replacement UV tube that is known to work.
If the lamp starts immediately, you've identified the problem.
If the new bulb behaves exactly like the old one, the ballast or wiring system becomes much more likely.
Step 4: Inspect the Ballast and Wiring
After disconnecting power, open the fixture housing if it can be safely accessed.
Check for:
- Loose wire connections.
- Burnt insulation.
- Corrosion.
- Swollen electronic components.
- Melted plastic around the ballast.
Many electronic ballasts include labels indicating voltage ratings and compatible bulb types. Ensure the installed lamp matches the ballast specifications.
A mismatch between bulb wattage and ballast rating can also cause startup issues.
Step 5: Use a Multimeter for Basic Electrical Testing
If you're comfortable using basic electrical tools, a digital multimeter can help isolate the fault.
Continuity Testing
Check:
- Power cord continuity.
- Fuse continuity.
- Switch operation.
A blown fuse or defective switch may imitate ballast failure.
Input Voltage
Verify that power is reaching the ballast input terminals.
If input voltage is present but the ballast produces no output to the lamp, the ballast itself may be defective.
Because ballasts generate high startup voltages, avoid direct output testing unless you have proper training and equipment.
How Long Do UV Bulbs and Ballasts Last?
Understanding normal lifespan expectations can simplify diagnosis.
UV Bulb Lifespan
Typical fluorescent UV tubes last:
- 6,000–10,000 operating hours.
- About 12 months in many continuous-use mosquito traps.
- Up to two years in occasional-use applications.
However, UV intensity declines steadily over time, often dropping well before complete failure.
Electronic Ballast Lifespan
Most quality electronic ballasts operate reliably for:
- 30,000–50,000 hours.
- Five to ten years under moderate conditions.
Factors that shorten ballast life include:
- High temperatures.
- Poor ventilation.
- Frequent power surges.
- Excessive moisture.
- Continuous 24/7 operation.
If your ballast is many years old and multiple bulbs have already been replaced, ballast aging becomes increasingly likely.
Can a Bad Ballast Destroy a UV Bulb?
Yes.
A failing ballast may:
- Deliver unstable voltage.
- Overdrive the lamp.
- Cause repeated startup cycles.
- Overheat the electrodes.
This can shorten bulb life dramatically.
Likewise, a severely worn-out bulb can place additional stress on the ballast by forcing repeated ignition attempts.
Because these components work together, replacing both at the same time is sometimes the most practical long-term solution for older fixtures.
UV LED Systems: What If There Is No Ballast?
Not all UV lights use fluorescent tubes.
Modern UV LED curing lamps, portable UV flashlights, and many newer mosquito traps rely on LED technology.
Instead of a ballast, these devices use an LED driver circuit.
Common LED driver failure symptoms include:
- Complete loss of power.
- Random shutdowns.
- Partial LED illumination.
- Flashing or pulsing output.
The troubleshooting process remains similar:
- Check power.
- Inspect wiring.
- Verify the LED module.
- Test the driver.
- Look for visible circuit damage.
If your device contains individual LEDs rather than a glass tube, the issue is more likely to involve the driver than a traditional ballast.
Environmental Factors That Cause Ballast and Bulb Failure
Even well-designed UV lamps face harsh operating conditions.
Heat
Excessive heat accelerates capacitor aging inside electronic ballasts and reduces overall lifespan.
Humidity
Outdoor mosquito traps often encounter moisture that corrodes connectors and electronic components.
Dust and Debris
Dust buildup can block cooling vents and trap heat around the ballast.
Power Surges
Lightning strikes, unstable utility power, and inexpensive generators can damage sensitive electronic circuits.
Using a surge protector for indoor UV equipment is a simple way to reduce this risk.
Repair or Replace? Making the Smart Decision
Once you've identified the likely fault, you must decide whether repair is worthwhile.
Replace the Bulb If:
- The tube is blackened.
- UV output has weakened.
- The lamp has exceeded its rated lifespan.
- A new bulb restores normal operation.
Replace the Ballast If:
- Multiple new bulbs fail to start.
- The ballast emits buzzing or burning smells.
- Internal damage is visible.
- Electrical testing confirms power input but no lamp output.
Replace the Entire Fixture If:
- The housing is damaged.
- Multiple electrical components have failed.
- The repair cost approaches the cost of a new unit.
- Replacement parts are unavailable.
For many consumer-grade UV mosquito traps and small sterilization units, replacing the complete fixture may be more economical than extensive repairs.
Preventive Maintenance Tips
A little maintenance can significantly extend the lifespan of both the bulb and ballast.
Replace UV Bulbs Before Complete Failure
Waiting until the lamp stops working entirely may place additional strain on the ballast.
Keep Ventilation Openings Clean
Use compressed air or a soft brush to remove dust from cooling vents and internal compartments.
Avoid Frequent On-Off Cycling
Repeated startups create electrical stress on both bulbs and ballasts.
Protect Outdoor Units from Water
Even weather-resistant UV lamps should be protected from direct heavy rainfall and standing water whenever possible.
Use the Correct Replacement Parts
Always match bulb wattage, connector type, and ballast compatibility according to the manufacturer's specifications.
Installing an incorrect lamp may reduce performance or even damage the ballast.
Frequently Asked Questions
Can a UV bulb still glow if the ballast is bad?
Sometimes. A failing ballast may provide enough power for weak or intermittent illumination but not enough for stable operation.
Is it better to replace the bulb or ballast first?
In most cases, replace the bulb first because it is easier, less expensive, and statistically more likely to fail.
Why does my new UV bulb still not work?
Possible causes include a failed ballast, loose wiring, incompatible bulb specifications, a defective switch, or lack of incoming power.
Can I test a ballast without special equipment?
You can perform basic visual inspections and input voltage checks with a multimeter, but safely measuring ballast output typically requires additional knowledge and proper equipment.
Do UV LED lamps need a ballast?
No. UV LED systems use electronic driver circuits instead of traditional fluorescent ballasts.
Final Thoughts
When a UV lamp stops working, it's tempting to assume the bulb has burned out. In reality, the fault could be anywhere in the power system, with the ballast and bulb being the two most common suspects.
Fortunately, accurate diagnosis doesn't have to be complicated. By following a logical process—checking the power source, inspecting the tube, swapping in a known-good bulb, examining the ballast, and looking for visible electrical damage—you can quickly narrow down the cause and avoid replacing the wrong component.
As a simple rule of thumb:
- Blackened ends, weak UV output, and old age usually point to the bulb.
- Persistent flickering, buzzing, burnt smells, and failure with a new bulb usually point to the ballast.
Understanding the difference between these two components not only saves money but also helps keep your UV equipment operating safely and efficiently. Whether you're maintaining a UV mosquito trap, a sterilization system, a curing lamp, or an industrial UV fixture, knowing how to identify the true fault in the power system is one of the most valuable troubleshooting skills you can have.


