
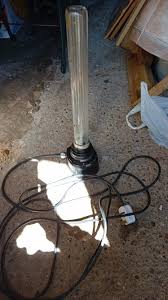
You flip the switch, plug in the power cord, and... nothing happens. Your UV lamp won't turn on. No glow, no buzzing sound, no sign of life.
Whether you use a UV mosquito trap, a UV curing lamp, a UV sterilization light, or a UV inspection flashlight, a non-working UV lamp can be frustrating—especially if you rely on it for daily tasks or outdoor comfort.
The good news? In many cases, a UV light that won't turn on isn't completely broken. The problem may be as simple as a loose power connection, a blown fuse, a worn-out bulb, or a faulty switch. In fact, many common UV lamp issues can be identified in just a few minutes with a basic inspection.
In this guide, we'll walk through the five most common electrical problems that cause UV lamps to stop working and explain how to troubleshoot them safely. We'll also cover preventive maintenance tips, signs that your UV bulb is reaching the end of its life, and when it's time to replace the entire unit.
Why UV Lamps Stop Working
Like any electrical device, UV lamps depend on several components working together:
- A stable power source
- A functioning power cord or battery
- A reliable switch or control circuit
- An operational ballast or driver (depending on the design)
- A healthy UV bulb or LED array
If any one of these components fails, the lamp may stop working completely or show symptoms such as:
- No light at all
- Flickering or intermittent operation
- Dim UV output
- Strange noises
- Burning smells
- The lamp only works after being tapped or moved
Fortunately, diagnosing these problems follows a logical process.
Safety First: Before You Begin Troubleshooting
Before opening or inspecting any UV lamp, take a few basic safety precautions.
Disconnect the Power
Always unplug the device from the wall outlet before opening the housing or touching internal components. If the unit runs on batteries, remove them before inspection.
Let the Lamp Cool Down
Some UV bulbs, especially fluorescent-style UV lamps, become hot during operation. Allow several minutes for the bulb and internal electronics to cool.
Avoid Direct UV Exposure
Never stare directly into an operating UV-C lamp or expose your skin or eyes to high-intensity ultraviolet radiation. UV-C light can damage both skin and eyesight.
Use Proper Tools
A simple troubleshooting kit should include:
- A flashlight
- A small screwdriver set
- A multimeter
- Spare batteries (if applicable)
- Cotton gloves for handling replacement bulbs
- A clean microfiber cloth
Now let's move on to the actual diagnosis.
Step 1: Check the Power Source
The first and simplest step is verifying that your UV lamp is actually receiving power.
It sounds obvious, but power supply issues account for a surprisingly large percentage of "broken" UV lights.
For Plug-In UV Lamps
Start by checking:
- Is the outlet working?
- Is the power strip switched on?
- Has a circuit breaker tripped?
- Is the adapter firmly connected?
- Is the plug loose or damaged?
A quick way to test the outlet is by plugging in another device, such as a phone charger or desk lamp.
If the replacement device also fails to power on, the issue may be the outlet itself rather than the UV lamp.
For Battery-Powered UV Lights
Portable UV flashlights and rechargeable mosquito lamps often use lithium-ion batteries.
Check for:
- Completely discharged batteries.
- Corroded battery contacts.
- Incorrect battery orientation.
- Swollen or damaged rechargeable cells.
If possible, install fresh batteries or fully recharge the device before moving on to more advanced troubleshooting.
Inspect the Power Cord
Carefully examine the entire length of the cable for:
- Cuts or abrasions.
- Pinched sections.
- Exposed wires.
- Burn marks.
- Loose connectors.
Repeated bending near the plug or adapter often causes internal wire fractures that aren't visible externally.
A damaged power cord should always be replaced rather than repaired with tape.
Step 2: Examine the UV Bulb or LED Module
If power is reaching the device but the lamp still won't illuminate, the light source itself may have failed.
Traditional UV Bulbs
Many mosquito traps and sterilization devices use fluorescent UV bulbs. These bulbs wear out over time, even if they don't completely burn out.
Common signs of a failing UV bulb include:
- Dark or blackened ends.
- Flickering before startup.
- Reduced brightness.
- Pink or purple flashes during operation.
- Long delays before lighting.
The average lifespan of many UV fluorescent bulbs ranges from 6,000 to 10,000 hours, although UV output often declines significantly before complete failure.
A bulb that still glows may already be producing much less ultraviolet energy than when it was new.
UV LED Lamps
Modern UV LED systems generally last much longer, often 20,000 to 50,000 hours or more. However, individual LEDs or the driver circuit may still fail.
Symptoms of LED failure include:
- Some LEDs lighting while others remain dark.
- Sudden complete loss of illumination.
- Uneven brightness across the panel.
- Rapid flickering.
Unlike fluorescent bulbs, LED arrays are often integrated into the circuit board and may require replacement of the entire module.
Try a Known Working Replacement
If you have access to a compatible replacement bulb, install it temporarily. If the lamp immediately begins working again, you've identified the problem.
Always use a replacement bulb with the exact wattage and specifications recommended by the manufacturer.
Step 3: Inspect the Switch and Internal Connections
A surprisingly common cause of UV lamp failure is a defective switch or a loose electrical connection.
Every time a switch is pressed, tiny electrical contacts inside the mechanism open and close. Over time, these contacts can wear out, corrode, or become contaminated with dust and moisture.
Signs of a Faulty Switch
Your switch may be failing if:
- The lamp only works when you wiggle the switch.
- You have to press unusually hard.
- The switch feels loose.
- The device turns on briefly and then shuts off.
- There is no clicking sensation when activated.
Check for Loose Connectors
If the housing can be safely opened, inspect internal wiring for:
- Disconnected terminals.
- Loose push-on connectors.
- Burned wire insulation.
- Corrosion around contact points.
- Broken solder joints.
Portable mosquito lamps and outdoor UV traps are especially vulnerable because vibration during transport can gradually loosen internal connections.
If a connector has simply come loose, reconnecting it securely may restore operation.
Look for Moisture Damage
Outdoor UV lights often operate in humid environments or may accidentally be exposed to rain.
Signs of water intrusion include:
- Green or white corrosion.
- Rust on metal terminals.
- Mineral deposits.
- Discolored circuit boards.
If moisture damage is severe, replacement of the affected electronic components may be necessary.
Step 4: Test the Fuse, Ballast, or Driver Circuit
If the bulb is healthy and the switch appears functional, the next suspect is the lamp's control electronics.
Different types of UV lights use different power management systems.
What Is a Ballast?
Many fluorescent UV lamps rely on an electronic ballast to regulate current and provide the voltage needed to start the bulb.
If the ballast fails, the bulb will not illuminate even if the bulb itself is perfectly good.
Symptoms of ballast failure include:
- Buzzing or humming sounds.
- Repeated flickering.
- The bulb flashes briefly but never stays on.
- Burn marks or a strong electrical smell.
What Is an LED Driver?
UV LED lamps use a driver circuit rather than a ballast. The driver converts incoming AC or DC power into the precise voltage and current required by the LEDs.
A defective driver may cause:
- Complete power loss.
- Random shutdowns.
- Flashing LEDs.
- Very dim operation.
Check the Fuse
Many UV devices include a small internal fuse to protect against electrical surges.
A blown fuse may result from:
- Voltage spikes.
- Short circuits.
- Overheating.
- Component failure elsewhere in the circuit.
Using a multimeter in continuity mode, you can check whether the fuse is intact. If it has blown, replace it only with one of the exact same rating.
Never bypass a fuse or install one with a higher amperage rating, as doing so creates a significant fire hazard.
Step 5: Inspect the Main Circuit Board for Visible Damage
If all previous checks pass, the issue may lie within the main electronic control board.
While advanced board-level repair requires technical knowledge, many failures leave visible clues.
What to Look For
Carefully inspect the circuit board under good lighting.
Possible warning signs include:
- Burned or charred areas.
- Cracked solder joints.
- Bulging capacitors.
- Melted plastic connectors.
- Broken traces.
- Loose integrated circuits.
Electronic components naturally degrade over time, especially in devices that experience:
- High heat.
- Outdoor temperature swings.
- Moisture.
- Dust accumulation.
- Frequent power surges.
In many consumer UV lamps, replacing the entire control board—or replacing the lamp itself—is often more economical than attempting complex electronic repairs.
Common UV Lamp Problems and Their Likely Causes
| Symptom | Most Likely Cause |
|---|---|
| Lamp completely dead | No power, bad cord, blown fuse |
| Flickers continuously | Aging bulb or faulty ballast |
| Works only occasionally | Loose connection or bad switch |
| Turns on, then shuts off | Overheating or driver failure |
| Very dim UV output | Worn-out bulb or aging LEDs |
| Burning smell | Electrical short or overheating component |
| Only some LEDs light up | Partial LED module failure |
This quick reference chart can help narrow down the problem before you begin disassembling the device.
How Long Do UV Lamps Usually Last?
Lifespan depends on the lamp technology and operating conditions.
Fluorescent UV Bulbs
- Average lifespan: 6,000–10,000 hours.
- UV output gradually decreases over time.
- Annual replacement is often recommended for heavy use.
UV LED Lamps
- Typical lifespan: 20,000–50,000 hours.
- More energy efficient.
- Better resistance to vibration.
- Lower maintenance requirements.
It's important to remember that UV intensity often drops before visible light output changes. A bulb may appear functional while delivering significantly reduced ultraviolet performance.
Preventive Maintenance Tips to Avoid Future Problems
The best way to avoid unexpected UV lamp failure is through regular maintenance.
Keep the Lamp Clean
Dust and debris can block ventilation openings and reduce cooling efficiency.
Use a dry microfiber cloth to wipe the housing and gently clean the bulb surface. Never spray water or cleaning chemicals directly into the device.
Inspect the Cord Regularly
Coil cords loosely during storage and avoid wrapping them tightly around the lamp body, which can stress the wiring.
Protect the Lamp from Moisture
Even outdoor-rated units benefit from additional protection during heavy rain or long periods of storage.
Store portable UV lights in a dry location and allow damp equipment to dry completely before use.
Replace Bulbs on Schedule
Don't wait for complete failure. If your UV mosquito trap or sterilization lamp has been running for thousands of hours, replacing the bulb proactively can maintain peak performance.
Avoid Frequent Power Cycling
Rapidly switching the lamp on and off can place additional stress on fluorescent starters, ballasts, and electronic drivers.
Should You Repair or Replace the UV Lamp?
Sometimes repair is the smart option. Other times, replacement is more practical.
Repair Makes Sense If:
- The power cord is damaged.
- The fuse has blown.
- The UV bulb has reached the end of its life.
- A simple connector has come loose.
- The switch is inexpensive and easily replaced.
Replacement May Be Better If:
- The main circuit board is severely damaged.
- The LED module is integrated and unavailable separately.
- The repair cost approaches the price of a new unit.
- The lamp is very old and inefficient.
- Multiple components have failed simultaneously.
For inexpensive consumer mosquito traps and portable UV devices, replacing the entire unit often saves time and money.
Frequently Asked Questions
Why does my UV lamp flicker but not stay on?
This is commonly caused by an aging bulb, a failing ballast, or an unstable power supply.
Can a UV bulb burn out even if it still glows?
Yes. UV output gradually decreases over time, so the bulb may emit visible light while producing much less ultraviolet energy.
Is it safe to replace a UV bulb myself?
In most cases, yes—provided the lamp is unplugged and you follow the manufacturer's instructions. Avoid touching the glass directly with bare fingers when possible.
Can a power surge damage a UV lamp?
Absolutely. Electrical surges can damage fuses, driver circuits, ballasts, and sensitive electronic components.
Why won't my rechargeable UV lamp turn on after storage?
The battery may have entered a deep discharge state, or the contacts may have developed corrosion during storage. Fully recharge the battery and inspect the terminals before assuming the unit has failed.
Final Thoughts
A UV lamp that suddenly stops working doesn't automatically mean you need to buy a replacement. In fact, many common failures can be traced to a handful of simple electrical issues: a dead power source, a worn-out bulb, a loose connection, a faulty switch, or a failed fuse.
By following these five troubleshooting steps, you can systematically narrow down the problem and often restore your UV light to working condition without expensive repairs.
To recap, always check:
- The power supply and cord.
- The UV bulb or LED module.
- The switch and internal wiring.
- The fuse, ballast, or driver circuit.
- The main control board for visible damage.
Regular cleaning, proper storage, and timely bulb replacement can also extend the life of your UV lamp and reduce the chance of unexpected failures.
Whether you use a UV mosquito killer, a curing light for DIY projects, a sterilization device, or a portable UV flashlight, a little preventive maintenance goes a long way. And the next time your UV lamp refuses to turn on, you'll know exactly where to start looking.


