
Gemstones have fascinated humanity for thousands of years. From ancient royal crowns to modern engagement rings, their beauty and rarity make them highly desirable—and unfortunately, highly counterfeited. As synthetic gems, glass imitations, and treated stones become more advanced, traditional “eye test” methods are no longer enough.
One of the most powerful yet underused tools in gemstone authentication is ultraviolet (UV) light. Simple, portable, and surprisingly revealing, UV light can expose hidden properties inside gemstones that the naked eye can never see.
This guide breaks down everything you need to know about using UV light to evaluate gemstones like a professional—covering science, practical techniques, real-world examples, and common mistakes to avoid.
1. Why UV Light Works for Gemstone Identification
To understand UV testing, you first need to understand fluorescence.
Fluorescence occurs when a material absorbs ultraviolet radiation and re-emits it as visible light. Some minerals naturally fluoresce due to trace elements or structural impurities. Others remain completely inert.
This difference creates a powerful diagnostic tool:
-
Some real gemstones glow vividly under UV light
-
Some fake stones show unnatural or overly uniform fluorescence
-
Some treated stones reveal hidden enhancements
-
Some natural gems show no reaction at all
UV light doesn’t “prove” a stone is real—but it reveals clues that significantly narrow down its identity.
2. The Two Types of UV Light Used in Gem Testing
Not all UV lights are the same. Gemologists typically use two wavelengths:
Longwave UV (LWUV) – 365 nm
-
Most commonly used in gem testing
-
Safer for casual use
-
Produces stronger fluorescence in many minerals
-
Best first-choice tool
Shortwave UV (SWUV) – 254 nm
-
More powerful and more dangerous to eyes and skin
-
Reveals different fluorescence reactions than longwave
-
Required for advanced gemological analysis
Important safety note: Never look directly into UV light. Always use protective UV-filter glasses when working with shortwave UV.
3. What UV Light Can (and Cannot) Tell You
UV testing is powerful—but not absolute.
UV light CAN help you:
-
Distinguish some natural stones from glass imitations
-
Detect certain treatments (like resin filling or dyeing)
-
Identify fluorescence patterns unique to specific minerals
-
Spot synthetic diamonds and lab-grown materials in some cases
-
Reveal zoning or growth patterns in crystals
UV light CANNOT:
-
Confirm a gemstone is 100% natural
-
Determine exact origin (e.g., Burma vs. Mozambique ruby)
-
Replace advanced lab testing
-
Guarantee value or grading
Think of UV testing as a “first filter,” not a final verdict.
4. Essential Equipment for UV Gem Testing
You don’t need a lab to get started, but quality tools matter.
Must-have items:
-
365 nm longwave UV flashlight (high quality, not cheap toy-grade)
-
254 nm shortwave UV lamp (optional for advanced users)
-
Dark viewing box or dim room
-
Tweezers for handling stones
-
UV protective goggles (especially for SWUV)
Optional but helpful:
-
White LED flashlight for comparison
-
Magnifying loupe (10x recommended)
-
Gem tray with neutral background (black velvet works best)
5. How to Perform a Basic UV Test (Step-by-Step)
Follow this process for consistent results:
Step 1: Clean the gemstone
Oil, dust, and fingerprints can distort fluorescence results.
Step 2: Darken the environment
UV fluorescence is best observed in a dark room or enclosed box.
Step 3: Start with longwave UV
Place the stone under 365 nm light and observe:
-
Color of glow
-
Intensity
-
Uniformity
-
Pattern changes
Step 4: Rotate the stone
Fluorescence may vary depending on crystal orientation.
Step 5: Compare reactions
If you have multiple stones, compare them side by side.
Step 6: If needed, switch to shortwave UV
Only for experienced users with proper safety precautions.
6. Common Gemstones and Their UV Reactions
Understanding typical fluorescence patterns is crucial.
Diamond
-
Many natural diamonds fluoresce blue under longwave UV
-
Some show no fluorescence at all
-
Strong chalky blue may indicate certain types of natural origin
-
Synthetic diamonds may show unusual or uneven fluorescence
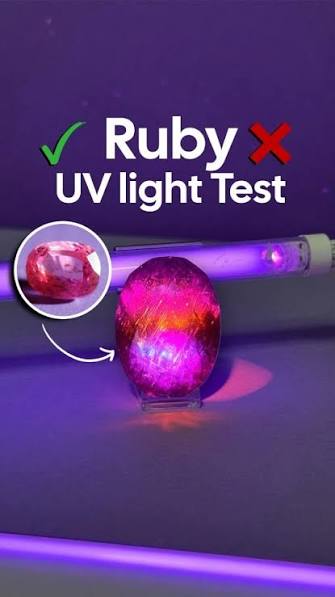
Ruby
-
Often shows strong red fluorescence under UV
-
Chromium content is responsible for glowing effect
-
Some heat-treated rubies show altered or reduced fluorescence
Sapphire
-
Most natural sapphires show weak or no fluorescence
-
Certain synthetic sapphires glow strongly or inconsistently
-
Color zoning may become visible under UV
Emerald
-
Typically inert or weakly fluorescent
-
Oil-treated emeralds may show unusual glow patterns
-
Synthetic emeralds often display stronger fluorescence
Quartz
-
Variable reaction depending on type
-
Amethyst often glows weakly or shows patchy fluorescence
-
Citrine is usually non-fluorescent
Jade (Jadeite and Nephrite)
-
Often inert
-
Dyed jade may show uneven or “splotchy” fluorescence
7. Spotting Fake Gemstones Using UV Light
One of the biggest advantages of UV testing is detecting imitations.
Glass imitations
-
Often show overly uniform glow
-
May fluoresce in unnatural neon colors
-
Lack internal zoning patterns seen in natural stones
Plastic imitations
-
Usually dull or completely non-fluorescent
-
May show surface-only glow
-
Often inconsistent under rotation
Synthetic gemstones
-
Can mimic natural fluorescence but often too perfect
-
Uniform internal structure under UV
-
Lack natural irregularities
8. Advanced UV Clues Professionals Look For
Once you’re comfortable with basic testing, you can begin spotting more subtle indicators.
1. Fluorescence zoning
Natural stones often grow in stages, creating uneven UV reactions.
2. Phosphorescence
Some diamonds and minerals continue glowing after UV light is removed.
3. Patchy fluorescence
Irregular glow areas may indicate treatments or composite stones.
4. Growth patterns
Crystal formation lines sometimes appear under UV light.
5. Surface vs. internal fluorescence
Surface-only glow often indicates coating or treatment.
9. Common Mistakes Beginners Make
UV testing is simple in concept but easy to misinterpret.
Mistake 1: Assuming fluorescence equals authenticity
A glowing stone is not automatically real.
Mistake 2: Using weak UV lights
Cheap lights often give misleading or inconsistent results.
Mistake 3: Testing in bright environments
Ambient light destroys visibility of fluorescence.
Mistake 4: Ignoring stone history
Heat treatment, irradiation, and oiling all affect results.
Mistake 5: Relying on UV alone
Always combine UV testing with visual inspection and density checks.
10. UV Light vs. Other Gem Testing Methods
UV testing is just one part of a larger toolkit.
Visual inspection
Look for inclusions, clarity, and cutting style.
Refractive index testing
Measures how light bends through the stone.
Density (specific gravity)
Helps distinguish similar-looking materials.
Magnification
Reveals internal flaws or synthetic growth lines.
UV light complements these methods—it does not replace them.
11. Real-World Example: Identifying a Fake Sapphire
Imagine you are given a deep blue sapphire.
At first glance, it looks perfect. But under UV light:
-
The stone glows bright green in patches
-
The fluorescence is uneven and artificial-looking
-
The glow appears only near the surface
Conclusion:
This is likely a synthetic sapphire or glass composite, not a natural corundum.
Without UV light, this deception might go unnoticed.
12. Safety Precautions When Using UV Light
UV light is powerful and should be handled responsibly.
-
Never shine UV light into eyes or skin
-
Always use protective eyewear with shortwave UV
-
Avoid prolonged exposure
-
Store UV devices safely away from children
-
Do not rely on cheap unregulated UV lamps
13. Building a Professional Gem Testing Workflow
Serious collectors and dealers follow a structured approach:
-
Visual inspection
-
UV fluorescence test
-
Magnification (loupe or microscope)
-
Weight and density measurement
-
Refractive index test
-
Cross-reference with known gem databases
UV testing sits early in this chain as a fast screening tool.
14. Final Thoughts: Why UV Testing Matters
In a world where synthetic gemstones are nearly indistinguishable from natural ones by appearance alone, UV light offers a rare advantage: it reveals hidden physical truths.
It won’t solve every mystery, and it won’t replace laboratory certification—but it dramatically improves your ability to detect inconsistencies, spot imitations, and understand what you are really looking at.
Whether you are a collector, jeweler, or enthusiast, learning to read UV fluorescence is like learning a second language of gemstones—one that speaks in light instead of words.
And once you learn it, you’ll never look at a gemstone the same way again.


