
Aquarium heaters are one of the most essential—and most overlooked—pieces of equipment in any fish tank. They work quietly in the background, maintaining stable temperatures that your fish, plants, and beneficial bacteria rely on. But because heaters operate continuously and are constantly exposed to water, minerals, and debris, they are also one of the first components in an aquarium to fail.
The good news?
With the proper cleaning and maintenance routine, you can dramatically extend your heater’s lifespan, reduce the risk of malfunctions, and protect your fish from sudden temperature swings or dangerous overheating.
This comprehensive 4,000-word guide covers everything you need to know about keeping your aquarium heater in top condition—from routine cleaning schedules to advanced troubleshooting. Whether you use glass, stainless steel, titanium, or a smart digital heater, this guide will help you maximize durability and performance.
1. Why Heater Maintenance Matters More Than You Think
Most aquarium hobbyists only replace their heater when it fails. But by then, the damage may already be done—temperature shock, bacterial blooms, or even fish loss.
Here’s why proper maintenance is crucial:
1.1 Heaters Run 24/7
Unlike filters or lights, aquarium heaters are always working. This constant operation causes wear on thermostats, heating coils, seals, and electronic components.
1.2 Mineral Deposits Shorten Lifespan
Calcium, magnesium, and other minerals form hard scale on your heater over time. This reduces heating efficiency and forces the unit to work harder, shortening its life.
1.3 Organic Debris Causes Overheating
Slime, algae, and fish waste can coat the heater, reducing heat transfer and leading to dangerous hot spots.
1.4 Poor Maintenance Increases Failure Risks
Heater failures come in many forms:
-
Stuck-on thermostats
-
Cracked glass
-
Faulty wiring
-
Leaking seals
-
Inaccurate temperature readings
-
Internal corrosion
Almost all of these issues can be prevented—or identified early—with proper care.
2. How Long Should an Aquarium Heater Last?
Although manufacturers often claim a heater can last 3–5 years, the real lifespan varies depending on:
-
Heater quality
-
Material (glass, stainless steel, titanium)
-
Cleaning habits
-
Placement
-
Water hardness
-
Tank size
-
Operating temperature
Realistic lifespan estimates:
| Heater Type | Expected Lifespan | Notes |
|---|---|---|
| Glass heater | 1.5–3 years | Most fragile, more affected by mineral buildup |
| Stainless steel heater | 2–4 years | Durable but can corrode if not cleaned |
| Titanium heater | 3–7+ years | Most reliable, corrosion-resistant |
| Smart/digital heater | 3–6 years | Electronics may limit lifespan |
With consistent maintenance, you can often double your heater’s lifespan.
3. Cleaning Your Aquarium Heater: Step-by-Step Guide
Regular cleaning is the single most effective way to extend your heater’s service life. Below is the safest and most comprehensive cleaning routine.
3.1 How Often Should You Clean It?
-
Lightly stocked tank: every 2–3 months
-
Heavily stocked tank: monthly
-
Hard water tanks: every 3–6 weeks
-
Saltwater tank: monthly (salt accumulates faster)
3.2 Tools You’ll Need
-
Soft sponge
-
Soft-bristle toothbrush
-
White vinegar
-
A bowl or bucket for soaking
-
Clean towel
-
Cotton swabs
-
Thermometer (for recalibration)
Avoid harsh cleaners, bleach, or abrasive pads—they can damage seals or scratch the heater.
3.3 Step 1: Unplug the Heater and Let It Cool
Never remove or clean a heater while it’s plugged in.
Why?
Sudden exposure to air or cold water can crack the glass or warp the internal components.
Let it cool for 20–30 minutes.
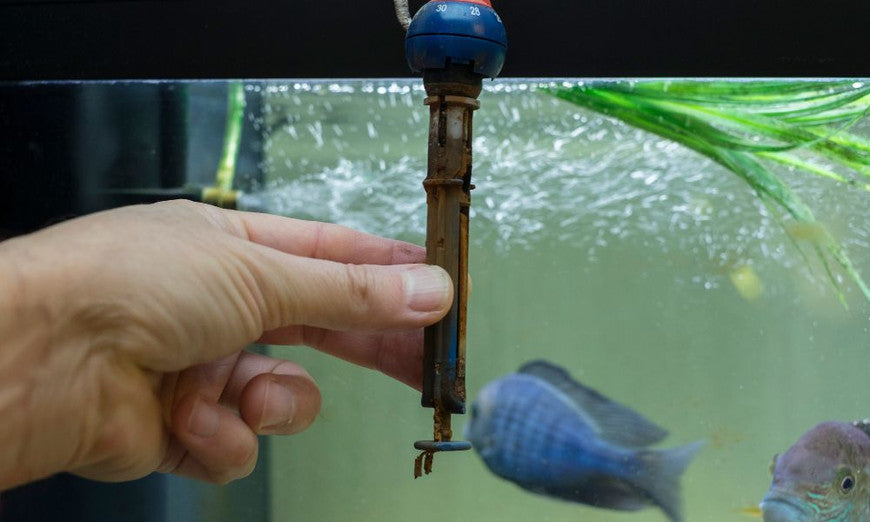
3.4 Step 2: Remove the Heater and Inspect It
Look for:
-
Cracks
-
Bulging areas
-
Burn marks
-
Loose caps or seals
-
Corroded components
-
Cloudy or milky moisture inside the tube
If you find any of these signs, replace the heater immediately.
3.5 Step 3: Vinegar Soak for Mineral Removal
Mineral deposits form hard, white crusts that reduce heating efficiency. Vinegar dissolves them safely.
How to do it:
-
Fill a container with warm water.
-
Add white vinegar (1:1 ratio).
-
Soak the heater for 15–45 minutes depending on buildup.
-
Avoid submerging the power cord junction or digital control heads.
3.6 Step 4: Scrub Gently
Use a soft sponge or toothbrush to remove:
-
Algae
-
Mineral scale
-
Slime
-
Fish waste buildup
Never use metal tools.
3.7 Step 5: Clean Hard-to-Reach Areas
Cotton swabs help remove dirt around:
-
Temperature dials
-
Seams
-
Suction cup brackets
3.8 Step 6: Rinse and Dry Completely
Rinse thoroughly to remove vinegar residue.
Dry with a clean towel and let air-dry 10 minutes before reinstalling.
3.9 Step 7: Recalibrate the Temperature
Every cleaning session should include calibration.
-
Set the heater to your target temperature.
-
Compare readings with a separate thermometer.
-
Adjust the dial as needed (many heaters can be off by 1–3°F).
This ensures accuracy and avoids temperature shock.
4. Preventive Maintenance Tips That Extend Heater Lifespan
Cleaning is important—but there’s more you can do to protect your heater and your fish.
4.1 Maintain Stable Water Parameters
Large fluctuations in temperature, pH, or mineral content can stress heater components.
Keep:
-
pH stable
-
Hardness moderate
-
Temperature changes gradual
4.2 Avoid Overworking Your Heater
A heater that’s too small for your tank will constantly run at maximum power.
Solution:
Use this guideline:
-
3–5 watts per gallon for most tanks
-
More wattage for cold rooms or big temperature gaps
It’s better to buy a slightly stronger heater that works less frequently.
4.3 Use a Heater Guard
Heater guards prevent:
-
Cracks from rocks or décor
-
Attacks from large fish
-
Accidental bumps during cleaning
This is essential for tanks with cichlids, plecos, turtles, or goldfish.
4.4 Improve Water Circulation
Good water flow prevents heater hot spots and reduces debris accumulation.
Place your heater:
-
Near a filter outlet, or
-
In a high-flow area
You can also use:
-
A circulation pump
-
A wave maker
4.5 Avoid Dry-Firing (Exposing the Heater to Air)
Running a heater out of water destroys it within seconds.
Always double-check:
-
Water level
-
Heater fully submerged (if submersible)
-
Thermostat line remains underwater
Dry-firing is one of the most common causes of heater death.
4.6 Use a Temperature Controller
A controller adds a second layer of safety:
-
Prevents overheating
-
Reduces thermostat wear
-
Helps maintain stable temperature
-
Avoids accidental spikes
This can extend heater lifespan by 20–40%.
4.7 Protect the Power Cord
Cord damage leads to:
-
Short circuits
-
Electrical hazards
-
Heater failure
To prevent it:
-
Avoid bending at sharp angles
-
Keep out of reach of nibbling animals
-
Replace frayed cords immediately
5. Signs Your Heater Needs Replacement
Even with good maintenance, heaters eventually wear out.
Watch for:
-
Condensation inside the tube
-
Inconsistent temperature
-
Temperature stuck too high or too low
-
Burned smell
-
Discoloration
-
Slow response times
-
Loud clicking or buzzing
-
Visible corrosion
-
Cracks
If your heater is 3+ years old and showing symptoms, it’s safer to replace it.
6. Advanced Maintenance Tips for Long-Term Reliability
For hobbyists wanting maximum heater performance, these advanced techniques can add years of life.
6.1 Rotate Between Two Heaters
Using two smaller heaters instead of one large one:
-
Reduces wear
-
Provides redundancy
-
Ensures stable heat
-
Prevents failure disasters
6.2 Pair Your Heater With a Smart Plug
A smart plug allows:
-
Scheduled off/on cycles
-
Protection against power surges
-
Usage monitoring
-
Remote control
6.3 Run Regular Temperature Audits
Every 1–2 months, check:
-
Thermostat accuracy
-
Heating speed
-
Warm vs cold spots in tank
This helps catch early issues before failures occur.
6.4 Store Backup Heaters Properly
If you keep spares:
-
Store in dry place
-
Avoid temperature extremes
-
Don’t coil wires too tightly
7. Common Mistakes That Shorten Heater Lifespan
Avoid these very common errors:
❌ Running heater un-submerged
❌ Cleaning with harsh chemicals
❌ Placing heater directly in gravel
❌ Using a damaged heater
❌ Letting algae completely cover it
❌ Ignoring water hardness
❌ Using a heater too small for tank
❌ Turning heater on while dry
❌ Letting fish bump into it freely
Fixing these mistakes dramatically improves heater longevity.
8. Final Thoughts: A Well-Maintained Heater Equals a Healthy Aquarium
Your heater is one of the most important—and most fragile—pieces of equipment in your aquarium system. With proper cleaning, smart maintenance habits, and regular inspection, you can extend its lifespan from years to many years while keeping your aquatic life safe.
A well-maintained heater provides:
-
Stable temperature
-
Healthy fish
-
Fewer surprises
-
Lower long-term costs
-
A more reliable aquarium environment
Your fish may never thank you—but your wallet will.


