
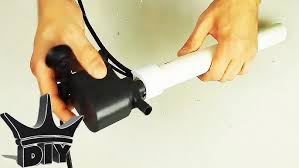
Aquarium heaters are one of the most essential pieces of equipment in any fish tank — but let’s be honest, they are also one of the ugliest. A long glass tube, suction cups, bright indicator lights, exposed wires, and visible temperature dials can completely break the natural atmosphere of a beautifully aquascaped tank.
If you’ve ever spent hours arranging rocks and plants only to have the entire aesthetic ruined by a giant glass stick on the side wall, you're not alone. The good news? You don’t have to live with it.
This in-depth guide walks you through everything you need to know about giving your heater an aesthetic makeover — safely, creatively, and cost-effectively. Whether you want to hide it, disguise it, repaint it, or integrate it into your aquascape, this tutorial covers it all.
Welcome to the world of DIY heater beautification.
1. Why Beautify Your Aquarium Heater? Understanding the Motivation
Before starting, it's important to understand why hobbyists choose to redesign or decorate their heaters.
1.1 The Aesthetic Problem
Modern aquascaping emphasizes minimalism, natural flow, and immersive underwater scenery. Visible heaters disrupt this flow.
Common issues include:
-
Shiny glass sticks reflecting light
-
Bright red/blue LEDs
-
Bulky external temperature dials
-
Dark plastic ends standing out against light substrates
-
Wires cluttering the back panel
Beautification solves all of these.
1.2 The Psychological Factor
A cleaner, more natural-looking aquarium:
-
reduces stress,
-
enhances the sense of immersion,
-
strengthens your connection with the ecosystem,
-
and makes your tank look more professional.
When every detail blends together, the tank feels “complete.”
1.3 Practical Motivation
Beautifying your heater can also:
-
Reduce algae buildup (smooth surfaces grow less algae).
-
Improve fish safety by eliminating sharp edges or exposed adhesive.
-
Help stabilize temperature by guiding better water flow around the heater.
Beautification isn't only about looks — it can enhance performance too.
2. Important Safety Rules Before Starting Any DIY Modification
Before you grab glue, paint, or 3D-printed shells, it’s crucial to address safety. Aquarium heaters are electrical devices operating underwater — safety always comes first.
2.1 Never Open the Heater Body
The internal components are sealed for waterproofing. Once opened, the seal is broken, and:
-
electric shock risks increase,
-
moisture can enter the tube,
-
the heater may explode when heating.
DIY beautification should happen around, not inside, the heater.
2.2 Use Only Aquarium-Safe Materials
These include:
-
ABS or PLA+ 3D prints
-
Epoxy-coated surfaces
-
Aquarium-safe silicone
-
Inert plastics
-
Slate stone
-
Ceramic pipes
Avoid:
-
Spray paints (unless aquarium-safe and fully sealed)
-
Metal parts
-
Wood treated with chemicals
-
Hot glue (fails underwater)
2.3 Avoid Blocking Heat Output
Your DIY cover must:
-
Allow water flow,
-
Permit heat radiation,
-
Prevent insulation buildup.
Over-enclosing your heater can cause overheating.
2.4 Maintain Accessibility
The following must remain visible or accessible:
-
Temperature dial
-
Indicator lights (optional but helpful)
-
Suction cup mounting
-
Power cord exit
Safety and adjustability always come first.
3. Five Popular DIY Styles for Beautifying Aquarium Heaters
Here are five proven aesthetic directions hobbyists use. Choose one that fits your tank style.
Style 1: Rock-Style Heater Cover (Most Natural Look)
Perfect for planted tanks, hardscape tanks, and biotopes.
How It Works
You build a shell around the heater using:
-
Fake rock panels
-
Slate pieces
-
Epoxy-coated styrofoam carvings
-
3D-printed stone textures
Why It Works
Rock blends seamlessly with:
-
Dragon stone
-
Lava rock
-
Forest stone
-
Seiryu stone
-
River stones
Key Notes
-
Leave openings for water circulation.
-
Do not fully seal the heater in foam.
-
Avoid sharp edges around fish.
Style 2: Plant-Camouflage Heater (Using Decorations to Hide It)
Ideal for heavily planted tanks.
How It Works
You use:
-
Artificial plants
-
Real tall-stem plants
-
Moss wraps
-
Anubias or java fern mounted on mesh
Pros
-
Zero modification to heater body
-
Easy to remove
-
Very natural look
Cons
-
Needs periodic cleaning
-
Tall plants may shade the heater light indicator
Style 3: 3D-Printed Heater Shrouds (Custom Fit and Modern Look)
For DIY enthusiasts with access to 3D printing.
Benefits
-
Full customization
-
Durable
-
Precise fit
-
Creative shapes possible
Common design ideas:
-
Stone texture
-
Bamboo tube
-
Hexagon shell
-
Sleek black enclosure
-
“Background wall” style cover
Material Tips
Use:
-
ABS
-
PETG
-
PLA+ with epoxy seal
Avoid:
-
Naked PLA (warps over time)
Style 4: Background Integration (Hiding the Heater Behind a False Wall)
For tanks with 3D backgrounds or compartments.
How It Works
You build:
-
A rock-style background panel
-
A slim chamber behind it
-
A removable slot for the heater
Pros
-
Completely invisible
-
Very clean look
-
Great for show tanks
Cons
-
Requires more DIY skill
-
Harder to access for adjustments
Style 5: Minimalist Stealth Heaters (Color Matching and Simplified Design)
For modern tanks or rimless aquariums.
Techniques
-
Repainting suction cups black
-
Wrapping wires in black tubing
-
Using dark backgrounds
-
Adding matte vinyl to the heater body
-
Hiding indicator LEDs with translucent tape
This isn’t a full cover — it’s subtle minimization.
4. Step-by-Step DIY Heater Beautification Tutorial
Below is a complete practical workflow to make your heater blend into your aquascape.
Step 1: Choose Your Style
Ask yourself:
-
What does your aquascape look like?
-
Do you prefer natural or modern?
-
Do you want the heater fully hidden or subtly minimized?
-
Do you have access to 3D printing?
Choose one of the five styles above.
Step 2: Measure Your Heater
Critical measurements include:
-
Total length
-
Diameter
-
Position of LED or dial
-
Cord angle
-
Clearance around mounting points
Write these down.
Step 3: Build Your Aesthetic Cover
Here are the safest and most effective DIY materials.
Option A: Foam + Epoxy Rock Cover
-
Carve styrofoam into rock shapes
-
Coat with epoxy resin
-
Paint using aquarium-safe pigments
-
Cut a channel for water flow
-
Attach suction cups to the back
Option B: Slate Stone Heater Box
-
Arrange thin slate pieces
-
Glue using aquarium silicone
-
Create front and side vents
-
Leave the top open
Option C: 3D-Printed Cage
-
Design cylinder or box in CAD
-
Add water flow windows
-
Add clips for mounting
-
Print in PETG
-
Seal with epoxy
Option D: “Plant Curtain” Heater Hide
-
Use plant mesh
-
Weave java moss or attach epiphytes
-
Form a sheet that hangs in front of heater
Step 4: Safety Check Before Submerging
Make sure:
-
No sharp edges
-
No loose paint or coating
-
All epoxy fully cured
-
Water can flow freely
-
Heater isn’t insulated too tightly
Step 5: Install the Beautified Heater
Placement tips:
-
Always near filter output
-
Vertical or horizontal depending on type
-
Avoid substrate contact
-
Ensure indicator light remains visible
Step 6: Monitor the First 48 Hours
Check:
-
Water temperature stability
-
No overheating
-
No discoloration of materials
-
Fish behavior near the heater
If all looks good — your beautified heater is complete.
5. Advanced Customization Ideas for Aquascaping Enthusiasts
If you want to go beyond basic beautification, try these expert-level ideas.
5.1 Heater + Driftwood Integration
Carve a groove in resin driftwood and nest the heater inside.
5.2 Heater “Chimney” in a Hardscape Mountain
Create a hollow stone mountain with a slot for the heater.
5.3 LED Accent Lighting Around the Heater Cover
Use low-intensity LEDs to highlight plants while hiding the equipment.
5.4 Heater Built Into a Sponge Filter Tower
Completely invisible and excellent heat distribution.
6. Maintenance Tips for Your DIY Heater Cover
Even after beautification, routine care matters.
6.1 Clean Monthly
-
Remove algae with a toothbrush
-
Rinse gently
-
Do not scrub epoxy-coating aggressively
6.2 Check for Heat Blockage
If temperature fluctuates, widen vents.
6.3 Replace if Cracked
A damaged cover can trap heat.
6.4 Inspect Silicone and Adhesives
Replace if peeling.
7. Common Mistakes to Avoid
Many beginners make these errors — avoid them to keep your tank safe.
❌ Mistake 1: Fully sealing the heater in foam
Risk: Overheating + heater failure.
❌ Mistake 2: Using toxic paints
Risk: Water contamination.
❌ Mistake 3: Blocking the indicator light
Makes troubleshooting difficult.
❌ Mistake 4: Adding too many decorations
Can cause uneven heating.
❌ Mistake 5: Using metal wires or clips
Corrosion + toxicity.
8. Conclusion: Make Your Heater Beautiful Without Sacrificing Safety
DIY heater beautification is a fun, creative, and rewarding project that transforms your tank from “functional but messy” to “professional, natural, and visually stunning.”
With the right materials, proper ventilation, and attention to safety, your heater can become a seamless part of your aquascape — or disappear entirely.
Whether you choose:
-
rock camouflage,
-
plant styling,
-
3D-printed shells,
-
or full background integration,
your aquarium will instantly look cleaner and more harmonious.
Your heater doesn’t have to be ugly.
With a little creativity, it can blend in beautifully.


