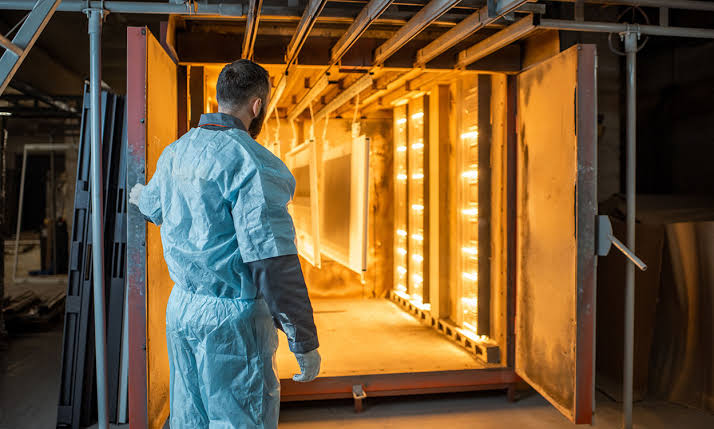
In today’s advanced manufacturing industries, coating quality is no longer judged only by appearance. Whether it is automotive components, electronic devices, optical products, medical equipment, or high-end consumer goods, coatings must deliver outstanding durability, consistency, and visual performance.
A flawless coating surface represents more than aesthetic value. It reflects manufacturing precision, process stability, and product reliability.
However, even experienced manufacturers often face two major coating defects:
- Bubbles trapped inside the coating layer
- Cracks appearing after curing or during product use
These problems can lead to:
- Product rejection
- Increased material waste
- Production delays
- Higher labor costs
- Customer complaints
While coating formulation, surface preparation, and environmental conditions all influence coating quality, one of the most overlooked factors is the adjustment of UV curing lamp power.
Many manufacturers assume that higher UV power always creates better curing results. In reality, excessive UV intensity can create internal stress, overheating, and surface defects. On the other hand, insufficient UV power may cause incomplete curing, weak adhesion, and long-term cracking problems.
The key is not using maximum power.
The key is finding the optimal UV curing energy balance.
This guide explains how precision coating manufacturers can adjust UV lamp power correctly to eliminate bubbles and cracks while improving coating performance, production efficiency, and product reliability.
Understanding the Relationship Between UV Curing and Coating Quality
How UV Curing Works in Precision Coating Applications
UV curing is a photochemical process that uses ultraviolet light energy to transform liquid coatings into solid protective layers.
Unlike traditional thermal drying, which depends mainly on heat transfer, UV curing activates photoinitiators inside the coating material. These photoinitiators generate chemical reactions that quickly convert liquid polymers into a hardened structure.
A successful UV curing process depends on several critical factors:
- UV wavelength
- Light intensity
- Exposure time
- Distance between lamp and surface
- Coating thickness
- Material formulation
- Surface condition
Among these variables, UV lamp power plays one of the most important roles.
The correct power level ensures that the coating cures:
- Completely
- Uniformly
- Without excessive internal stress
- Without surface damage
Why Incorrect UV Power Creates Coating Defects
Many coating failures are not caused by poor materials. Instead, they result from an imbalance between UV energy and coating reaction speed.
When UV power is incorrectly adjusted, several problems can occur.
Problem One: Coating Bubbles Caused by Excessive UV Intensity
Coating bubbles are among the most common defects in UV curing applications.
They appear as:
- Small air pockets
- Raised surface points
- Internal voids
- Uneven coating textures
At first glance, bubbles may look like a simple appearance issue. However, they often indicate deeper problems within the curing process.
How Excessive UV Power Creates Bubbles
When UV lamp intensity is too high, the coating surface may cure too quickly.
This creates a phenomenon known as surface over-curing.
The outer layer becomes hard before gases, solvents, or trapped air inside the coating can escape.
As a result:
- The surface forms a hardened shell.
- Internal gases become trapped.
- Pressure builds beneath the surface.
- Visible bubbles appear.
This problem is especially common with:
- Thick coatings
- Multi-layer coatings
- High-viscosity materials
- Complex product geometries
Problem Two: Coating Cracking Caused by Improper UV Energy Balance
Cracking is another serious coating failure.
Unlike bubbles, cracks may appear immediately or develop weeks later after exposure to:
- Temperature changes
- Mechanical stress
- Chemical contact
- Environmental conditions
How Excessive UV Power Causes Cracks
A coating does not simply become better by curing faster.
When UV intensity is too high, polymer chains may react too aggressively, causing:
- Excessive cross-linking
- Increased coating hardness
- Reduced flexibility
- Internal stress accumulation
The coating becomes strong but brittle.
Over time, normal expansion and contraction can create cracks.
How Insufficient UV Power Causes Cracks
Low UV power creates the opposite problem.
If the coating does not receive enough curing energy:
- Polymerization remains incomplete
- Adhesion becomes weak
- The coating structure remains unstable
Eventually, the coating may crack because it lacks proper mechanical strength.
Therefore, both excessive and insufficient UV power can create cracking problems.
The solution is accurate power optimization.
The Science Behind UV Lamp Power Optimization
Understanding UV Energy Density
UV curing performance depends not only on lamp power but also on total energy delivered to the coating surface.
The relationship can be described as:
UV Energy = UV Intensity × Exposure Time
Where:
- UV intensity refers to the power output of the lamp
- Exposure time refers to how long the coating receives UV radiation
This means manufacturers can achieve the same curing result through different combinations.
For example:
- Higher intensity + shorter exposure time
- Lower intensity + longer exposure time
The ideal combination depends on the coating material and production requirements.
Step-by-Step Guide to Optimizing UV Lamp Power
Step 1: Analyze the Coating Material First
Before adjusting UV lamp settings, manufacturers should understand the coating characteristics.
Important factors include:
Coating Thickness
Thicker coatings require more UV energy because light penetration becomes more difficult.
However, increasing power too aggressively can cure the surface faster than the inner layer.
Chemical Composition
Different coatings respond differently to UV radiation.
Important differences include:
- Photoinitiator type
- Resin structure
- Additives
- Viscosity
A coating designed for UV curing requires specific energy conditions.
Required Performance Level
Different applications require different hardness and flexibility levels.
For example:
Automotive exterior coatings may prioritize:
- Weather resistance
- Scratch protection
Flexible plastic coatings may prioritize:
- Impact resistance
- Elasticity
UV power settings must match the final product requirements.
Step 2: Measure Current UV Output
Many coating problems occur because manufacturers adjust UV systems based on assumptions rather than actual measurements.
A professional evaluation should include:
- UV intensity testing
- Lamp aging analysis
- Energy distribution testing
- Temperature monitoring
UV lamps naturally lose performance over time.
A system that operated correctly six months ago may no longer deliver the same curing energy today.
Regular measurement helps maintain consistent production quality.
Step 3: Adjust UV Intensity Gradually
A common mistake is making large power adjustments immediately.
A better approach is controlled optimization.
Recommended process:
- Reduce or increase UV power slightly.
- Test coating performance.
- Evaluate surface appearance.
- Check adhesion and hardness.
- Record results.
- Continue adjustment if necessary.
Small adjustments allow manufacturers to identify the ideal curing window.
Finding the Ideal UV Lamp Power Range for Precision Coating
Optimizing UV lamp power is not about selecting the highest available setting. It is about creating a controlled curing environment where the coating receives exactly the energy required to achieve the desired chemical reaction.
Every coating material has an optimal curing window.
Below this range, the coating may remain soft, unstable, or poorly bonded.
Above this range, the coating may become overly rigid, overheated, or vulnerable to defects.
Finding this balance is the foundation of precision UV coating.
The Importance of UV Intensity Testing
A professional UV curing process should always be based on measured data rather than visual judgment alone.
Operators may observe that a coating looks dry on the surface, but appearance does not always indicate complete curing.
A coating may have:
- A hard outer layer
- An under-cured internal structure
- Uneven polymerization
- Hidden mechanical weakness
UV measurement tools help manufacturers understand actual curing conditions.
Important measurement parameters include:
UV Intensity
UV intensity measures the amount of UV radiation reaching the coating surface.
If intensity is too low:
- Curing speed decreases
- Adhesion becomes weaker
- Surface hardness may be insufficient
If intensity is too high:
- Surface curing may become too rapid
- Internal stress may increase
- Cracking risks may rise
UV Dose
UV dose represents the total amount of energy received by the coating during exposure.
It is especially important when adjusting conveyor speed or production cycle time.
A stable UV dose helps ensure:
- Consistent coating quality
- Repeatable production results
- Reduced defect rates
Understanding the Relationship Between UV Wavelength and Coating Performance
UV lamp power is only one part of the equation.
The wavelength of UV light also has a major impact on curing quality.
Different coatings respond to different UV wavelengths.
Common UV curing ranges include:
- UVA
- UVB
- UVC
Most industrial UV curing applications rely heavily on UVA wavelengths because they provide effective penetration and stable curing performance.
Why Incorrect Wavelength Selection Causes Defects
Even if the lamp power is correct, the coating may still fail if the wavelength does not match the photoinitiator system.
Possible results include:
- Incomplete curing
- Surface stickiness
- Poor adhesion
- Internal cracking
A successful UV curing system requires compatibility between:
- UV wavelength
- Coating chemistry
- Lamp technology
- Production speed
Solving Common Coating Defects Through UV Power Adjustment
Solution 1: Eliminating Bubbles by Controlling Initial Curing Speed
One effective method for preventing bubbles is controlling how quickly the coating surface hardens.
Instead of immediately applying maximum UV power, manufacturers can use a staged curing approach.
A typical strategy includes:
Stage One: Low-Intensity Pre-Curing
A lower UV intensity allows:
- Air release
- Solvent evaporation
- Material leveling
The coating remains flexible enough for internal gases to escape.
Stage Two: Full UV Curing
After the coating stabilizes, higher UV energy can be applied to complete polymerization.
This approach reduces:
- Bubble formation
- Surface defects
- Internal pressure buildup
It is particularly useful for:
- Thick coatings
- Transparent coatings
- High-gloss finishes
Solution 2: Preventing Cracks by Avoiding Over-Curing
Over-curing is one of the most common causes of brittle coatings.
To reduce cracking risks, manufacturers should carefully manage:
- UV intensity
- Exposure time
- Cooling conditions
The goal is not maximum hardness.
The goal is balanced performance.
A high-quality coating should provide:
- Strong adhesion
- Good hardness
- Appropriate flexibility
- Long-term durability
Solution 3: Optimizing Lamp Distance
The distance between the UV lamp and the coating surface directly affects energy distribution.
A lamp positioned too close may create:
- Excessive intensity
- Local overheating
- Uneven curing
A lamp positioned too far may result in:
- Insufficient UV energy
- Slow curing
- Weak coating performance
The correct distance depends on:
- Lamp design
- Reflector structure
- Product shape
- Coating requirements
Precision adjustment is essential.
Solution 4: Improving Cooling Management
Although UV curing is not a traditional heating process, UV lamps can still generate heat.
Poor heat management may contribute to:
- Coating deformation
- Surface stress
- Material discoloration
Effective cooling systems help maintain stable conditions.
Cooling methods may include:
- Air circulation
- Heat sinks
- Temperature monitoring
- Intelligent power adjustment
Maintaining the correct thermal environment improves coating consistency.
UV LED Technology: A New Approach to Precision Curing Control
Traditional UV mercury lamps have been widely used in industrial applications for decades.
However, UV LED curing systems are becoming increasingly popular because they provide greater control over curing energy.
Advantages of UV LED Systems
1. Precise Power Adjustment
UV LED systems allow manufacturers to control output more accurately.
Operators can adjust:
- Light intensity
- Exposure time
- Energy distribution
This precision helps prevent both under-curing and over-curing.
2. Instant Start and Stop Capability
Traditional UV lamps often require warm-up periods.
During this time:
- Energy is consumed
- Production efficiency decreases
UV LED systems activate immediately, improving process control.
3. Lower Heat Generation
UV LEDs generate significantly less unwanted heat.
This makes them suitable for:
- Plastic components
- Electronic products
- Heat-sensitive materials
Lower thermal impact reduces deformation risks.
4. Longer Operating Life
UV LED modules typically provide stable performance over long periods.
Benefits include:
- Reduced maintenance
- More consistent curing output
- Lower replacement frequency
Practical Factory Checklist for UV Power Optimization
Manufacturers can use the following checklist to improve curing performance.
Before Production
✓ Confirm coating material specifications
✓ Verify UV lamp wavelength compatibility
✓ Measure actual UV output
✓ Check lamp cleanliness
✓ Confirm correct lamp distance
✓ Inspect cooling performance
During Production
✓ Monitor curing appearance
✓ Check coating hardness
✓ Test adhesion performance
✓ Record UV parameters
✓ Observe defect patterns
After Production
✓ Analyze rejected products
✓ Compare curing data
✓ Adjust parameters carefully
✓ Schedule regular UV system maintenance
Case Example: Reducing Defects Through UV Power Optimization
A precision coating manufacturer producing decorative electronic components experienced several quality issues:
- Small surface bubbles
- Occasional cracking after environmental testing
- Inconsistent coating hardness
The company initially increased UV lamp power, assuming stronger curing would solve the problem.
However, defect rates increased.
After analyzing the curing process, engineers discovered that excessive UV intensity was creating rapid surface hardening while trapping internal stress.
The solution involved:
- Reducing peak UV intensity
- Extending controlled exposure time
- Adjusting lamp distance
- Improving cooling airflow
- Monitoring UV dose
After optimization, the company achieved:
- Lower defect rates
- More consistent coating appearance
- Improved product durability
- Reduced material waste
The experience demonstrated an important principle:
Better curing does not come from more UV energy. It comes from the right UV energy.
Building a Data-Driven UV Coating Process
The future of precision coating will depend increasingly on intelligent monitoring.
Advanced UV curing systems are now integrating:
- Digital sensors
- Automated feedback control
- Production data analysis
- Remote monitoring capabilities
These technologies allow manufacturers to maintain stable curing conditions even when production environments change.
For example, an intelligent system can detect:
- Lamp performance decline
- Temperature changes
- Production speed variations
and automatically compensate for these factors.
This reduces human error and improves manufacturing consistency.
Finding the Ideal UV Lamp Power Range for Precision Coating
Optimizing UV lamp power is not about selecting the highest available setting. It is about creating a controlled curing environment where the coating receives exactly the energy required to achieve the desired chemical reaction.
Every coating material has an optimal curing window.
Below this range, the coating may remain soft, unstable, or poorly bonded.
Above this range, the coating may become overly rigid, overheated, or vulnerable to defects.
Finding this balance is the foundation of precision UV coating.
The Importance of UV Intensity Testing
A professional UV curing process should always be based on measured data rather than visual judgment alone.
Operators may observe that a coating looks dry on the surface, but appearance does not always indicate complete curing.
A coating may have:
- A hard outer layer
- An under-cured internal structure
- Uneven polymerization
- Hidden mechanical weakness
UV measurement tools help manufacturers understand actual curing conditions.
Important measurement parameters include:
UV Intensity
UV intensity measures the amount of UV radiation reaching the coating surface.
If intensity is too low:
- Curing speed decreases
- Adhesion becomes weaker
- Surface hardness may be insufficient
If intensity is too high:
- Surface curing may become too rapid
- Internal stress may increase
- Cracking risks may rise
UV Dose
UV dose represents the total amount of energy received by the coating during exposure.
It is especially important when adjusting conveyor speed or production cycle time.
A stable UV dose helps ensure:
- Consistent coating quality
- Repeatable production results
- Reduced defect rates
Understanding the Relationship Between UV Wavelength and Coating Performance
UV lamp power is only one part of the equation.
The wavelength of UV light also has a major impact on curing quality.
Different coatings respond to different UV wavelengths.
Common UV curing ranges include:
- UVA
- UVB
- UVC
Most industrial UV curing applications rely heavily on UVA wavelengths because they provide effective penetration and stable curing performance.
Why Incorrect Wavelength Selection Causes Defects
Even if the lamp power is correct, the coating may still fail if the wavelength does not match the photoinitiator system.
Possible results include:
- Incomplete curing
- Surface stickiness
- Poor adhesion
- Internal cracking
A successful UV curing system requires compatibility between:
- UV wavelength
- Coating chemistry
- Lamp technology
- Production speed
Solving Common Coating Defects Through UV Power Adjustment
Solution 1: Eliminating Bubbles by Controlling Initial Curing Speed
One effective method for preventing bubbles is controlling how quickly the coating surface hardens.
Instead of immediately applying maximum UV power, manufacturers can use a staged curing approach.
A typical strategy includes:
Stage One: Low-Intensity Pre-Curing
A lower UV intensity allows:
- Air release
- Solvent evaporation
- Material leveling
The coating remains flexible enough for internal gases to escape.
Stage Two: Full UV Curing
After the coating stabilizes, higher UV energy can be applied to complete polymerization.
This approach reduces:
- Bubble formation
- Surface defects
- Internal pressure buildup
It is particularly useful for:
- Thick coatings
- Transparent coatings
- High-gloss finishes
Solution 2: Preventing Cracks by Avoiding Over-Curing
Over-curing is one of the most common causes of brittle coatings.
To reduce cracking risks, manufacturers should carefully manage:
- UV intensity
- Exposure time
- Cooling conditions
The goal is not maximum hardness.
The goal is balanced performance.
A high-quality coating should provide:
- Strong adhesion
- Good hardness
- Appropriate flexibility
- Long-term durability
Solution 3: Optimizing Lamp Distance
The distance between the UV lamp and the coating surface directly affects energy distribution.
A lamp positioned too close may create:
- Excessive intensity
- Local overheating
- Uneven curing
A lamp positioned too far may result in:
- Insufficient UV energy
- Slow curing
- Weak coating performance
The correct distance depends on:
- Lamp design
- Reflector structure
- Product shape
- Coating requirements
Precision adjustment is essential.
Solution 4: Improving Cooling Management
Although UV curing is not a traditional heating process, UV lamps can still generate heat.
Poor heat management may contribute to:
- Coating deformation
- Surface stress
- Material discoloration
Effective cooling systems help maintain stable conditions.
Cooling methods may include:
- Air circulation
- Heat sinks
- Temperature monitoring
- Intelligent power adjustment
Maintaining the correct thermal environment improves coating consistency.
UV LED Technology: A New Approach to Precision Curing Control
Traditional UV mercury lamps have been widely used in industrial applications for decades.
However, UV LED curing systems are becoming increasingly popular because they provide greater control over curing energy.
Advantages of UV LED Systems
1. Precise Power Adjustment
UV LED systems allow manufacturers to control output more accurately.
Operators can adjust:
- Light intensity
- Exposure time
- Energy distribution
This precision helps prevent both under-curing and over-curing.
2. Instant Start and Stop Capability
Traditional UV lamps often require warm-up periods.
During this time:
- Energy is consumed
- Production efficiency decreases
UV LED systems activate immediately, improving process control.
3. Lower Heat Generation
UV LEDs generate significantly less unwanted heat.
This makes them suitable for:
- Plastic components
- Electronic products
- Heat-sensitive materials
Lower thermal impact reduces deformation risks.
4. Longer Operating Life
UV LED modules typically provide stable performance over long periods.
Benefits include:
- Reduced maintenance
- More consistent curing output
- Lower replacement frequency
Practical Factory Checklist for UV Power Optimization
Manufacturers can use the following checklist to improve curing performance.
Before Production
✓ Confirm coating material specifications
✓ Verify UV lamp wavelength compatibility
✓ Measure actual UV output
✓ Check lamp cleanliness
✓ Confirm correct lamp distance
✓ Inspect cooling performance
During Production
✓ Monitor curing appearance
✓ Check coating hardness
✓ Test adhesion performance
✓ Record UV parameters
✓ Observe defect patterns
After Production
✓ Analyze rejected products
✓ Compare curing data
✓ Adjust parameters carefully
✓ Schedule regular UV system maintenance
Case Example: Reducing Defects Through UV Power Optimization
A precision coating manufacturer producing decorative electronic components experienced several quality issues:
- Small surface bubbles
- Occasional cracking after environmental testing
- Inconsistent coating hardness
The company initially increased UV lamp power, assuming stronger curing would solve the problem.
However, defect rates increased.
After analyzing the curing process, engineers discovered that excessive UV intensity was creating rapid surface hardening while trapping internal stress.
The solution involved:
- Reducing peak UV intensity
- Extending controlled exposure time
- Adjusting lamp distance
- Improving cooling airflow
- Monitoring UV dose
After optimization, the company achieved:
- Lower defect rates
- More consistent coating appearance
- Improved product durability
- Reduced material waste
The experience demonstrated an important principle:
Better curing does not come from more UV energy. It comes from the right UV energy.
Building a Data-Driven UV Coating Process
The future of precision coating will depend increasingly on intelligent monitoring.
Advanced UV curing systems are now integrating:
- Digital sensors
- Automated feedback control
- Production data analysis
- Remote monitoring capabilities
These technologies allow manufacturers to maintain stable curing conditions even when production environments change.
For example, an intelligent system can detect:
- Lamp performance decline
- Temperature changes
- Production speed variations
and automatically compensate for these factors.
This reduces human error and improves manufacturing consistency.