
Outdoor mosquito zappers have become essential tools for patios, gardens, camping spaces, restaurants, and backyard living areas. They provide chemical-free insect control, improve comfort during warm evenings, and help reduce mosquito populations around homes. However, one of the most common and frustrating problems users encounter is water intrusion leading to electrical short circuits.
Rainstorms, sprinkler systems, accidental drops into water, high humidity, or improper storage can allow moisture to enter an outdoor mosquito lamp. Once water reaches internal electrical components, performance issues—or complete failure—can occur.
If your outdoor mosquito zapper suddenly stops working after exposure to water, don’t panic. In many cases, the device can be safely repaired if handled correctly and quickly.
This comprehensive guide explains:
- Why water causes short circuits
- Warning signs of internal damage
- Immediate emergency actions
- Step-by-step repair methods
- When repair is possible—and when it isn’t
- Prevention strategies to protect your investment
Let’s walk through everything you need to know.
Why Water Causes Short Circuits in Mosquito Zappers
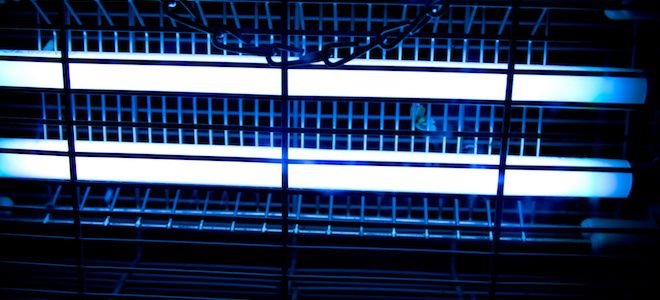
Outdoor mosquito lamps combine electricity, ultraviolet light, and high-voltage grids. These components are effective for insect control but sensitive to moisture.
Inside most mosquito zappers are:
- Power supply module
- Transformer or voltage booster
- UV or LED light source
- High-voltage electric grid
- Control circuit board
- Cooling vents and wiring connections
Water disrupts electrical systems in three primary ways:
1. Electrical Bridging
Water—especially rainwater containing minerals—conducts electricity. When moisture connects two electrical points that should remain separate, current flows incorrectly, creating a short circuit.
2. Corrosion
Moisture begins oxidizing metal parts almost immediately. Circuit boards and connectors can degrade within hours.
3. Insulation Breakdown
Electrical insulation prevents dangerous current leakage. Water weakens insulation materials, increasing failure risk.
Even waterproof-rated devices can fail if seals age or water enters through unexpected paths.
Common Ways Outdoor Mosquito Lamps Get Wet
Many users assume outdoor devices are fully waterproof, but most are only weather-resistant, not submersible.
Typical causes include:
- Heavy rain entering ventilation openings
- Garden sprinklers spraying directly onto the unit
- Flooded patios or decks
- Condensation buildup overnight
- Washing the device with a hose
- Leaving the lamp outdoors during storms
- Damaged rubber seals or cracked housings
Understanding how water entered helps determine repair success.
Warning Signs of Water-Induced Short Circuit
Recognizing early symptoms can prevent permanent damage.
Watch for:
- Device suddenly shuts off after rain
- Flickering or dim UV light
- Buzzing sound disappears
- Burning smell
- Circuit breaker trips when plugged in
- Visible moisture inside housing
- Clicking noises without illumination
- Sparks or unusual heat
If any of these occur, disconnect power immediately.
Step One: Immediate Emergency Actions (Critical)
What you do in the first few minutes determines whether repair is possible.
1. Unplug the Device Immediately
Never touch internal parts while connected to electricity.
Water + electricity = serious safety risk.
2. Move to a Dry Environment
Bring the unit indoors to a:
- Dry room
- Garage
- Covered workspace
Avoid continued exposure to humidity.
3. Do NOT Turn It Back On
Many users test repeatedly. This worsens damage by allowing electricity to flow through wet circuits.
Powering a wet device can permanently destroy components.
Step Two: External Drying Procedure
Before opening the device, remove as much surface moisture as possible.
Recommended Method
- Wipe exterior with microfiber cloth
- Remove detachable trays or covers
- Shake gently to release trapped water
- Place unit upright for drainage
Avoid aggressive shaking that could damage internal wiring.
What NOT to Do
- Do not use a microwave
- Do not place in direct oven heat
- Do not use high-temperature hair dryers
- Do not expose to open flame or heaters
Excess heat warps plastic and damages electronics.
Step Three: Safe Disassembly (If Warranty Allows)
Only proceed if:
- Device is unplugged
- Warranty has expired or permits maintenance
- You are comfortable handling basic electronics
Tools Needed
- Screwdriver set
- Soft brush
- Isopropyl alcohol (90%+)
- Cotton swabs
- Compressed air (optional)
Opening the Housing
Remove screws carefully and document placement using photos. Many mosquito lamps use layered assemblies.
Once opened, inspect for:
- Water droplets
- Rust spots
- White mineral residue
- Burned components
- Loose wires
Step Four: Internal Drying Techniques
Proper drying is the most important repair step.
Method 1: Air Drying (Safest)
Place components in a warm, ventilated area for 24–48 hours.
Ideal conditions:
- 77–95°F (25–35°C)
- Low humidity
- Gentle airflow
A fan works better than heat.
Method 2: Desiccant Drying
Place device parts in a sealed container with:
- Silica gel packs
- Moisture absorbers
- Dry rice (emergency option)
Leave for 24–72 hours.
Method 3: Alcohol Displacement Cleaning
If mineral water residue is visible:
- Dip cotton swab in isopropyl alcohol.
- Clean affected circuit areas.
- Alcohol displaces moisture and evaporates quickly.
Never soak components completely.
Step Five: Inspect for Permanent Damage
After drying, examine critical components.
Check the Power Supply
Signs of failure:
- Burn marks
- Swollen capacitors
- Melted insulation
If present, replacement is safer than repair.
Check the Electric Grid
Look for:
- Bent wires touching each other
- Corrosion buildup
- Carbon tracking marks
Clean gently with alcohol and soft brush.
Check the Light Source
UV bulbs or LED modules may fail if water entered sockets.
Replace if dark or flickering after drying.
Step Six: Reassembly and Testing
Before powering on:
- Ensure everything is fully dry
- Confirm screws are tight
- Verify wires are not pinched
- Reinstall protective covers
First Power Test
Plug into a surge-protected outlet.
Stand back and observe:
- Light turns on normally
- No sparks or smoke
- Stable buzzing sound
Run device for 10–15 minutes under supervision.
If breaker trips or smell appears, unplug immediately.
When Repair Is NOT Recommended
Some damage is irreversible.
Replace the device if:
- Transformer is burned
- Circuit board shows blackened areas
- Strong electrical smell persists
- Housing cracked allowing repeated water entry
- Device repeatedly shuts off
Safety should always outweigh repair cost.
Preventing Future Water Damage
Prevention is easier than repair.
Choose Proper Placement
Install mosquito lamps:
- Under covered patios
- Beneath roof overhangs
- Away from sprinkler paths
Avoid ground-level placement where water accumulates.
Use Weather Shields
A simple protective cover dramatically reduces risk while maintaining airflow.
Elevate the Device
Mount at least 3–5 feet above ground level.
This improves both safety and mosquito attraction efficiency.
Inspect Seals Regularly
Check rubber gaskets every season.
Replace worn seals before rainy periods.
Understanding IP Ratings (Water Resistance Explained)
Outdoor electronics use IP ratings to indicate protection level.
Examples:
- IPX4 – Splash resistant
- IPX5 – Water jets
- IP65 – Dust tight + rain resistant
- IP67 – Temporary immersion
Most mosquito lamps are not designed for immersion, even if marketed for outdoor use.
Knowing this helps set realistic expectations.
Maintenance Habits That Extend Lifespan
Regular maintenance prevents moisture buildup.
Monthly routine:
- Clean insect debris from grid
- Check ventilation openings
- Wipe exterior surfaces
- Inspect power cord
- Remove dust accumulation
Clean devices operate cooler and resist moisture damage better.
Safety Mistakes to Avoid
Never:
- Operate a wet zapper
- Spray insecticide into electrical grids
- Wash device with running water
- Use damaged extension cords
- Ignore unusual smells
Electrical safety must remain the top priority.
Why Quick Action Matters
Electronics damaged by water follow a timeline:
First hour: moisture present but reversible
First day: corrosion begins
After several days: permanent circuit damage likely
Immediate drying greatly increases recovery success.
Outdoor Mosquito Control Beyond the Lamp
A zapper works best alongside environmental management:
- Remove standing water
- Trim dense vegetation
- Use fans in seating areas
- Maintain drainage systems
Combining strategies reduces mosquito populations significantly.
Frequently Asked Questions
Can rain permanently destroy a mosquito zapper?
Yes, if power remained connected during exposure or water reached the transformer.
How long should I dry the device?
Minimum 24 hours; ideally 48 hours before testing.
Is rice effective?
Rice helps slightly but silica gel or airflow works better.
Can I use a hair dryer?
Only cool-air mode from a distance. Heat damages components.
Final Thoughts: Repair Smart, Stay Safe
Outdoor mosquito lamps are valuable tools for comfortable outdoor living, but water exposure remains one of their biggest vulnerabilities. Fortunately, a short circuit caused by moisture does not always mean the device is beyond saving.
By acting quickly—disconnecting power, drying thoroughly, cleaning carefully, and testing safely—you can often restore functionality and extend the life of your equipment.
Remember these key principles:
- Safety first, always unplug
- Drying is more important than quick testing
- Heat is not your friend—airflow is
- Prevention saves money and frustration
A properly maintained mosquito zapper can provide years of reliable protection against biting insects. With the right emergency response and preventative habits, even unexpected water damage doesn’t have to end its service life.
When outdoor comfort meets smart maintenance, your evenings stay mosquito-free—and worry-free.


